Saturday, October 30, 2010
Pumpkin Whoopie Pies
We browsed through many magazines and cookbooks looking for the perfect sugar cookie recipe. We thought we had found just the right one until we were halfway through mixing the ingredients and realized it was meant more as a drop-cookie than a roll-out cookie. Guess this is the reason why you should read ALL the way through a recipe being starting. Oops!
We then tried to transition the half mixed ingredients into a different recipe. We mixed it, chilled it, and attempted to roll it. Well, needless to say the dough was extremely sticky and impossible to roll out. And my short temper that day caused me to become extremely frustrated real fast. By this point we were 0-2. And things were not going very smooth.
We didn't want to throw away the dough and waste the ingredients so we just started playing around! This is where the fun finally started. We added half a can of pumpkin and threw in some brown sugar. And then started adding spices until our taste buds were satisfied! Just don't ask us for the recipe. We have no clue what we added or how much.
We threw a scoop of the dough on the cookie sheet as a test. When we took it out of the oven it had baked into a perfect fluffy circle. At this point we both knew they were the ultimate whoopie pie cookie! Amazing how we went from flooding sugar cookies with royal icing to making pumpkin whoopie pies. Definitely an interesting string of events that lead to the final result!
We filled the whoopie pies with a brown sugar cinnamon cream cheese frosting. The recipe is from a post on cupcakestakethecake.com. If you can believe it, I actually haven't tasted the finished product. I know, kind of weird considering my love for sweets. But I am trying this new thing called self-control. We will just have to wait and see what the reviews are from the taste testers at the halloween party tomorrow night!
Another Sweet Escape!
-Jess
Wednesday, October 27, 2010
Hummingbird Cupcakes
2 1/2 cups all purpose flour
1 tsp baking powder
1/2 tsp baking soda
1/2 tsp salt
1 1/2 tsp cinnamon
3 eggs
2 cups sugar
1 cup canola oil
2 tsp vanilla
8 ounces sour cream
1 cup mashed bananas
1 cup drained crushed pineapple
1 cup chopped pecans
Preheat oven to 350 degrees. In mixer on medium speed, beat eggs and sugar until light and fluffy, approximately two minutes. On low, mix in oil and vanilla. Then mix in sour cream until just incorporated. Sift in flour, baking powder, baking soda, salt, and cinnamon. Stir until just incorporated. Then fold in bananas, pineapples, and pecans. Fill cupcake liners 2/3 full and bake 20-23 minutes.
Wishing you a Sweet Escape
-Jess
Monday, October 25, 2010
Cookies and Cream Cupcakes
One of the flavors that has been at the top of the many lists I have laying around and I have been dying to try is cookies and cream! The perfect opportunity presented itself this past week when we had some of the oreo cream cheese filling leftover from the pirate cake. I just had to do something with it since it is way too good to dump down the garbage disposal.
I wanted a recipe that had half of an oreo cookie on the bottom as a little extra surprise. And I happened to stumble upon one during one of the sleepless nights that I couldn't stop looking at baking blogs.
Until we meet again for our next sweet escape!
-Jess
Sunday, October 24, 2010
Pirate Cake! Argh
This cake may just be our proudest Sweet Escape finished project to date! When we were done we both pretty much just stood there and smiled at it. Hard to believe that we created it! And especially since we have never even taken any sort of baking or cake class! A little trial and error has been our preferred method of learning so far!
The cake was a layered eight inch yellow cake with oreo cream cheese filling. Both recipes that we have previously used. Kind of nice finally having recipes that we know will produce good results! This way we don't have to stress so much about the actual cake and can spend more time having fun with the decorations!
Okay, so on to the fun part! The amazing decorations! Before starting the project we googled images of "pirate cakes" to get the creative juices flowing. We got inspiration from one of the cakes that had a treasure map around the sides of the cake. We covered with cake with a marbelized light brown marshmallow fondant. We weren't too concerned about getting the fondant completely smooth because we figured the imperfections would add to the character of an old, worn map.
Michele was the fondant girl for this project. She found a skeleton with cross bones image on the internet and used it as a stencil for the cake topper. She took it to the next step and cut out individual teeth for the little guy. Very good touch! To finish it off she made it look rustic by rubbing on a little black and yellow color around the edges. Here he is...
She then made a few other little trinkets for the cake. A compass and red "X"
Seeing Katrina's face when she picked up the cake made all of the hard work well worth it! This is probably my favorite part of the whole process!
The big test is whether or not the cake makes it to its destination in one piece. It has to travel in a jeep for over two hours. Sure hope we pass the test!
Truly A Sweet Escape,
-Jess
Saturday, October 23, 2010
Who knew you could make pumpkin cream cheese cupcakes better!
Another Sweet Escape success!
Bake on!
-M
Thursday, October 21, 2010
Variety Pack!
We chose to do pumpkin with a spiced cream cheese, banana chocolate chip dipped in chocolate ganache, and chocolate with a raspberry filling and chocolate cool whip topping.
Pumpkin was a must given the time of year. And this is one of the recipes we just can't get enough of! In fact, this recipe has been filed in the "Sweet Escape G0-To Folder." Michele gave a little twist to the cream cheese frosting by adding some spices! Very, very yummy!!!
The banana chocolate chip cupcake had very good flavor, but was pretty much banana bread in a cupcake liner. More of a bread texture than cupcake. The chocolate ganache worked well on these cupcakes being that they domed up nicely! We are definitely ganache lovers! Makes every thing look so pretty with its smooth and shiny finish!
Chocolate and raspberry is one of my absolute favorite combinations! And we finally found a chocolate cupcake recipe that isn't dry and will rise nicely!! Woohoo!! The chocolate cool whip was a nice light topping for a cupcake that already was bursting with flavor.
Sunday, October 17, 2010
Princess Cupcakes
Friday, October 15, 2010
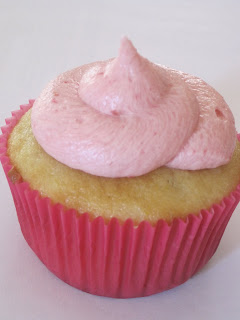
Lemon Cupcakes with Raspberry Frosting
I have been wanting to try the lemon and raspberry combination for weeks now and finally got around to it! And boy am I glad that I did! Tasting these two flavors together was pretty much like taking a bite of summer! Just needed one last reminder as the leaves are changing and falling.
I found the cupcake recipe on Allrecipes.com. It was listed under the "top 20 cupcakes" category and was given four and half out of five stars. Seemed like a pretty good recipe to try! And it turned out to be one of the best cupcakes I have made so far!! First of all, every single one rose perfectly and had that much wanted "cupcake dome." And the texture, moisture, and crumb was unlike any other cupcake. Beginning to think that sour cream might be the secret ingredient. This was the first time I have ever made a cake or cupcake with sour cream and it ended up turning out amazing! Seems like a reasonable conclusion to me :)
I did make one slight change to the recipe, and that was adding a couple of tablespoons of fresh squeezed lemon juice. The recipe only called for a couple teaspoons of lemon zest and I just didn't think that that would give quit enough. In fact the next time I think I will add even a little more lemon juice. The raspberry frosting seemed to kind of overpower the lemon taste.
I knew these were going to be a hit when I saw Zach's face after his first bite. It absolutely lite up! And with his mouth still full of cupcake, he managed to say "These are really, really good."
Wednesday, October 13, 2010
GANACHE!!!
aka "Heaven on Earth".
Once the ganache dried I decided to take some creative liberties to add that special Michele touch. On recipegirl.com, she suggests putting some to leftover ganache (that has thickened a bit) into a plastic bag and piping on some decorations. This is what I did below, but not before I took my food processor to some Snickers and Peanut Butter Cups to add a little POW! Some of these cupcakes don't have liners as I pulled them off when they were covered with the ganache around the rims.
This next little guy is probably about the prettiest cupcake I have made to date. So proud of it. So, after the ganache dried, I swirled on some peanut butter buttercream and add a few chocolate sprinkles. I used a "Fluffy Peanut Butter Frosting" recipe from http://www.allrecipes.com/. Complete heaven. Even the name is mouth watering. Chocolaty Cupcakes with Chocolate Ganache, Topped with Peanut Butter Buttercream and Chocolate Sprinkles. Delish! Who's hungry?
Bake on!
-M
Movin' On Up!!
I was super excited when my husband came home from work on Monday to tell me that he was sharing our blog with his coworkers. I was even more excited when he told me that he was able to find our blog via a search engine. No, we haven't hit the big time yet...we aren't on Google, but find us via Bing!! :)
That's right if you go to http://www.bing.com/ and search for "sweet escape bakery" we pop as number 5 on the search engine. If you search "sweet escape bakery blogspot" we pop up as number 1!!!
So for all of you who have a hard time remembering our website you have a new way to search for us. Share the info with your friends and family.
-M
Monday, October 11, 2010
Baseball Cupcakes
This past weekend my brother-in-law turned the big 3-0! Man is he getting old! :) When my sister told me she was hosting a party I hopped on the opportunity and offered to bake some cupcakes for the event! Perfect opportunity and excuse to try some new recipes and play around with fondant!
During the summer months softball pretty much consumes my brother-in-law's nights and weekends! This past summer he was forced to cut back, but previous summers he would play three or four nights a week and have tournaments every weekend. Only seemed fitting to make him baseball themed cupcakes! And by coincidence the Twins had a playoff game that night as well. (we won't discuss the outcome of that game though)
Another one of his absolute favorite things is Reese's peanut butter cups! Whenever these are around him consider them gone within moments. So to no surprise, when I asked my sister what flavors to make, her first response was "he loves chocolate cake." This immediately pulled the light bulb string for chocolate cake with peanut butter filling and dipped in ganache! Makes my mouth water just thinking of that combination!! I went on the hunt for "the best" chocolate cake recipe. I searched many blogs and was looking for the words "this is my go-to chocolate cake recipe." One of blogs swore by the Hershey's "Perfectly Chocolate" Chocolate Cake. Seemed logical for this to be a good choice being that it was from Hershey's. Well, didn't quit do the trick. First red flag was when the recipe told me to add one cup of boiling water and the batter was already like soup. Not knowing whether I should add it or not, I decided on going in the middle and adding half of the water. Definitely glad I didn't add all of it. The cupcakes were light and airy, but didn't rise to that nice classic cupcake dome. It ended up working out alright since I was cutting out the middle for the filling anyways, but it only means I have to continue the quest for a go-to chocolate cake! Dang, more chocolate batter and cupcakes to eat!
I also tried a new recipe for a yellow cake that I found on Bakerella's blog! Definitely one of my favorite blogs! I think the trick for this recipe was the creaming of the butter and sugar for seven minutes. I couldn't believe it when I read this. I think I usually cream mine for about a minute tops. By the time this seven minutes was up the butter was almost white and had more than doubled in size due to all of the air that was incorporated. I also loved that there were very few ingredients! Less chance to mess up the recipe! These cupcakes baked up very nicely and for now this will be the chosen yellow cake recipe!
As for the decorations I used marshmallow fondant! Starting to get the hang of working with this stuff! I wasn't able to find a home plate or baseball field cookie cutter so I ended up finding images online and making stencils. Worked well but was definitely a little more time consuming having to cut all of them out. In the beginning I wasn't very hopeful about how it would all turn out, but with a few genius ideas from Zach and many, many hours of time, I must say that I am dang proud of these!!
Sunday, October 10, 2010
Snickerdoodles
Blondie Cupcakes with Maple Butter Frosting
Oooh, I should also mention that I was going through a craze where I thought that everything mini was extra fabulous. So, of course, these Blondies are in mini-form. The cupcakes tasted delish. The toffee pieces in them, in my opinion, was unexpected, but a nice little surprise. They added this great chewy factor to the little cakes. I should mention, though, if you are looking for the typical moist, cake-like texture in this little morsels...you aren't going to find it. This recipe could easily be slapped in an 8x8 pan and turned into bars. I took some creative liberties and also added about a cup of white chocolate baking chips to the recipes. My addition was well received and I can't actually imagine the recipe without them.
While the cakes could have stood alone, I really wanted to try to recreate the maple butter flavor that Jess had been raving about. So, I turned to the ever faithful Google and found a maple butter frosting recipe. The recipe can be found at the following website: http://www.allrecipes.com/ The frosting was delicious and certainly was the buttery maple flavor I was looking for. Here is a picture of the final product. I wish it would have turned out better, but... you get the idea.
I think doing them in "mini" ended up being the right decision. Like I said earlier, the cupcakes could stand on their own whether as cupcakes or as bars. With the maple butter frosting, they do get sweeter and could, perhaps be too sweet for some people. Great with a glass of milk or a cup of joe. While I don't think that they topped Jess' traditional go to Blondies, she thought they were a hit as well. I was worried my coworkers weren't going to eat them as some of them had toppled over during transport. Let me tell you they were gone before I knew it!!!
Bake on!
-M
Friday, October 8, 2010
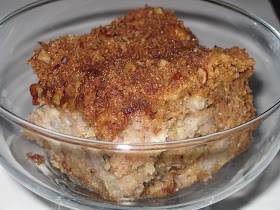
Apple Cake!
Before we get on to the delicious apple cake, just have to post a picture of my adorable little nephew taste testing an apple at the orchard!
Got this recipe from a dear friend of mine! Every recipe I get from her is outstanding, so I knew this one was sure to be the same. And of course, it didn't disappoint!
After not being able to control myself with this cake at home (yes, I ate a whole row in about ten minutes) I decided it was necessary to bring it to work. I knew if I didn't get it out of the house I would eat the whole thing in a day.
Betty's Apple Cake
2 cups sugar
3 eggs
1 cup oil
1 1/2 teaspoon vanilla
3 cups flour
1 teaspoon baking soda
1/2 teaspoon cinnamon
1 teaspoon salt
1 cup walnuts, coarsely chopped
4-5 apples, peeled and coarsely chopped
Cream sugar, eggs, oil, and vanilla.
Add dry ingredients. Dough will be THICK like cookie dough.
Add chopped walnuts and apples.
Spread in greased and floured 9x13 pan.
Bake at 350 degrees for 30-35 minutes.
Add topping mix and bake an additional 10 minutes or until a toothpick comes out clean.
Topping:
1/2 cup walnuts, chopped
1/2 cup packed brown sugar
1 1/2 teaspoon cinnamon
1/4 teaspoon nutmeg.
Wednesday, October 6, 2010
Truffles and Tortes
While the the sandwich and salad I had for lunch was delicious, the dessert was far better than words can describe. All four of us stood at the dessert counter completely indecisive and drooling over everything behind the glass. And of course we all had to get something different so we could have a little taste of several.
Saturday, October 2, 2010
First Cupcakes with a Filling!
These turtle cupcakes definitely gave me a hard time today, but as soon as I tasted them I couldn't even be mad about the two batches of caramel and one batch of frosting that I ended up putting down the garbage disposal. Who wouldn't love something that is a combination of chocolate, caramel, and nuts! In fact they might have just claimed the title for favorite cupcake! Which is weird considering I don't usually even like chocolate cake.
So I have never made homemade caramel before and actually still have not made a successful batch! I think the next kitchen gadget I will be purchasing is going to be a candy thermometer. That might explain part of the problem I had today. The first batch of caramel turned into a solid brick of sugar crystals. The second batch I attempted was way too runny and would have turned the cupcakes to mush if I had used it as a filling. The third batch didn't turn out perfect, but at least it was usable. It actually tasted really good, but was a little gritty. Gotta work on perfecting the creamy consistency!
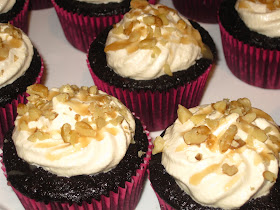
For the swiss meringue buttercream, I used brown sugar instead of white sugar. This was an idea I got from Oh, just put a cupcake in it. And it actually complimented the caramel filling very nicely!! I jazzed up the top of the cupcake with a little drizzle of caramel and a few chopped walnuts!
Swiss Meringue Buttercream
1 cup brown sugar
4 egg whites
1/4 tsp cream of tartar
3 sticks unsalted butter, softened, cubed into Tbsp chunks
1 tsp vanilla
Over pan of simmering water mix sugar, eggs, and cream of tartar. Whisk until mixture hits 160 degrees (or until you cannot feel sugar crystals any longer).
Transfer mixture to stand mixer bowl and beat on high with whisk attachment 8 - 10 minutes or until the bottom of bowl is cool.
Attach paddle and on medium start adding the butter 1 Tbsp at a time, letting the butter incorporate after each addition. After all of the butter is added, beat until it is smooth and then add vanilla.
Caramel Filling
from Southern Living
1 cup butter
2 cups suggar
2 tablespoons corn syrup
1 cup whipping cream
Melt butter in a saucepan over medium heat. Add sugar and corn syrup, and cook, stirring constantly, 6 to 8 minutes or until mixture turns a deep caramel color. Gradually add cream, and cook, stirring constantly, 1 to 2 minutes or until smooth. Remove from heat, and let cool. Chill 2 hours or until thickened and spreading consistency.