Showing posts with label Chocolate. Show all posts

Sunday, August 28, 2011

Easy Chocolate Zucchini Cake


If you love chocolate cake, you must try this recipe. If you don't love chocolate cake, this recipe may just have you changing your mind. No lie. I tried this recipe a few years ago and bring it out ever summer when my garden starts to produce an abundance of zucchini. It is so moist and delicious.


1/2 cup butter, softened

4 eggs

1 tsp vanilla

1/4 tsp almond extract

1 cup sour cream

1 chocolate fudge cake mix with pudding in the box, approx 18.25oz.

1/2 tsp ground cinnamon

1 medium zucchini, about 1.5 cups shredded

1 cup semi-sweet chocolate chips

1 cup chopped pecans or walnuts


Grease and flour a 12 cup Bundt cake pan. Heat oven to 325 degrees.


With an electric mixer, beat the butter until light; beat in eggs and flavorings. Beat in the sour cream and cinnamon; then slowly beat in the cake mix. Stir in the zucchini, chocolate chips, and pecans.


Spoon the batter into the prepared pan and bake 40-50 minutes, or until a toothpick inserted in the center of the cake comes out clean. Cool on a rack for 15 minutes. Invert the cake onto a serving plate to cool completely. Frost the cake or dust with powered sugar.


I add a whole bag of chocolate chips and omit the nuts when I bake this cake. I drizzle a few ounces of melted chocolate over the cake after it has cooled. Mmmm, good.


Bake on!

M

Monday, May 2, 2011

S'More Cookie Bars

Holy Cow!! It has been far too long since I have blogged. I have some catching up to do! I thought I would start out with a hit. These ooey gooey s'more bars are just as good as the sticky treats I grew up loving as a child. These treats are perfect for any season. While our s'more making season is quite limited in Minnesota, these are a perfect alternative and sooooooo much tastier than a "microwave s'more". The recipe is simple and the results are irresistible.

1/2 cup butter or margarine, softened
3/4 cup sugar
1 egg
1 tsp vanilla extract
1 1/3 cups flour
3/4 cup graham cracker crumbs
1 tsp baking powder
1 tsp salt
4 (1.55 oz. each) HERSHEY's Milk Chocolate bars
1 cup marshmallow creme

Heat oven to 350 degrees. Grease 8-inch square pan.

Beat butter and sugar in large bowl until light and fluffy. Add egg and vanilla; beat well. Stir together flour, graham cracker crumbs, baking powder and salt; add to butter mixture, beating until blended. Press half of dough into prepared pan.

Arrange chocolate bars over dough, breaking as needed to fit. Spread with marshmallow creme. Scatter bits of remaining dough over marshmallow; carefully press to form a layer.

Bake 30-35 minutes or until lightly browned. Cool completely in pan on wire rack. Cut into bars. Makes approximately 16 bars.

WARNING: wet nap not included!!
Bake on!
Michele

Linked to: Tidy Mom's I'm Lovin' It

Sunday, March 6, 2011

Buckeyes


Ever since I checked the book, Bake Explorations, out from the library, I have been dying to make this recipe. Chocolate+Peanut Butter+Cream Cheese+Graham Crackers=YUM! I knew with a list of ingredients like this it had to be a winning recipe. Apparently these treats are best known in Ohio where this candy resembles the horse chestnut from the Buckeye State. Living in Minnesota I have never heard of them, but sure do love em! They literally taste like you are eating peanut butter cookie dough wrapped in chocolate. The insides are light and soft just like cookie dough. One of my coworkers said it best when she said, "these are better than sex balls" as she kept popping them in her mouth. Too funny. I know there was more than one person who was having a hard time having just one. Warning: these may cause you to overindulge.

1/4 cup cream cheese, softened
1 1/2 cups peanut butter
1 cup graham cracker crumbs
3 cups confectioners' sugar
10 tbsp unsalted butter, melted and cooled
12 oz good-quality dark chocolate

In the bowl of a standing mixer fitted with a paddle attachment, beat the cream cheese and peanut butter until combined. Add the graham cracker crumbs and beat on medium speed for 10 seconds. Add the confectioners' sugar and butter. Beat at low speed for 20 seconds to prevent the sugar from spilling over; then gradually increase the speed until the mixture is completely combined. Scrape down the sides and bottom of the bowl and beat again. The mixture will feel slightly dry. Set the peanut butter filling aside while you melt the chocolate.

In the top of a double boiler set over hot water, melt the chocolate, stirring frequently until it is completely smooth. pour the chocolate into a small, deep bowl. Let it cool to tepid (about 100 degree) while you shape the peanut butter centers.

Line a sheet pan with parchment paper. Scoop out slightly more than 1 tablespoon's worth of filling and use your hands to form it into a ball. Place the ball on the prepared sheet pan and repeat the process until all the filling has been shaped. The balls can sit fairly close to each other on the sheet, just make sure they are not touching.

One by one, use a fork or large skewer, dip each ball into the chocolate. Roll the ball around from side to side to cover almost the entire peanut butter center, leaving a small part uncovered. Manipulate the buckeye so that the dripping chocolate covers the holes made by the fork. Let the excess chocolate drip back into the bowl and return each chocolate-covered buckeye to the pan. Refrigerate the entire sheet pan for about 30 minutes to set the chocolate before serving.
Bake on!
-Michele

Toffee Fingers

I love toffee and couldn't resist making this recipe. The light buttery crust pairs up perfectly with the toffee and chocolate. Yum. It's such an easy recipe to make with such satisfying results.

1 1/4 cups all -purpose flour
3/4 tsp baking powder
1/4 tsp salt
1/2 cup butter, softened
1/4 cup powdered sugar
2 tbsp packed brown sugar
1/2 cup toffee pieces
1/2 cup semisweet chocolate pieces
1 tsp shortening
1/4 cup toffee pieces

1. Preheat oven to 325 degrees. Line an 8x8 inch square baking pan with foil, leaving about 1 inch of foil extending over the ends of the pan; set aside.

2. In a small bowl stir together the flour, baking powder, and salt; set aside. In a large mixing bowl beat butter with an electric mixer on medium to high speed for 30 seconds. Add powdered sugar and brown sugar. Beat until combined, scraping sides of bowl occasionally. Beat in flour mixture. Stir in the 1/2 cup toffee pieces. Press mixture evenly into bottom of the prepared pan.

3. Bake in the preheated oven about 20 minutes or until light brown. Cool slightly in pan on a wire rack.

4. If using foil, remove warm bars from pan, using the overlapping foil to lift bars; place on cutting board. Cut into eight 1-inch strips. Cut each strip crosswise into three pieces, making 24 bars. Transfer bars to wire rack placed over waxed paper; cool completely.

5. In a small heavy saucepan heat and stir chocolate pieces and shortening over low heat until smooth. Cool slightly. Drizzle bars with melted chocolate. Immediately sprinkle bars with 1/4 cup toffee pieces. Let bars stand until chocolate is set.


Bake on!
-Michele

Sunday, February 27, 2011

ZEBRA!

Today is my Mom's birthday. Happy Birthday Mom! Yesterday the family got together to celebrate her birthday. She requested a chocolate cherry cake; not to be confused with black forest cake. I went to a copy of my Grandma's handwritten cookbook to find the recipe. After searching and searching for it and coming up empty, I called my Mom only to find out that this
cake was called "Cherry Fudge Bars" so I completely passed it during my search. Upon closer inspection, my Grandma does have "cake" written in the margin. I also found a note that this was from a Pillsbury Bake Off. Not sure when though. I adapted this recipe so that I was able to cover it in fondant and create the zebra affect. Ever since my parents went to Africa she has been a little zebra crazy. I'll explain my adaptations after the recipe. This one is so easy. You'll love it!

1 box Pillsbury Fudge Cake mix
1 can cherry pie filling
2 eggs, beaten
1 tsp almond flavoring
Mix the ingredients together. Bake in a 9x13 pan or on a cookie sheet (to make into bars) at 350 degrees for 35-45 minutes for the cake and 20-30 minutes for the bars.

Frosting:
1 cup sugar
5 Tbsp butter
1/3 cup milk
1 cup chocolate chips
1 tsp vanilla

Boil the sugar, butter and milk for 1 minute. Stir in the chocolate chips and vanilla until dissolved. Spread immediately.

Easy peasy, right? Instead of baking it in a 9x13 pan, I split the batter between 2 8-inch round cake pans. I baked them for about 40 minutes or so. Clearly the stove top frosting for this cake wasn't going to work on a round cake but I wanted to include the recipe in its fullness. Jess made a whipped ganache filling that was spread between the layers. The cake was then frosted with a chocolate frosting, previously seen on our ladybug cupcakes. The cherry pie filling in the cake makes it so moist and delicious. It was a hit, though my 4 year old nephew did quite see how the striped cake was a zebra. I'm sure he was expecting the full sculpted body. :) It didn't stop him from eating 2 pieces though.

Jess and I covered this cake in white marshmallow fondant. Then we rolled out fondant dyed black and cut out the stripes. We had no particular plan when it came to covering this cake and attempting to make it look like a zebra. Not too shabby if I do say so myself.
Bake on!
Michele

Sunday, February 13, 2011

Chocolate Pound Cake


Kind of hard to blog about a cake or recipe when I didn't have the chance to actually taste it. I made this cake for my mom's birthday, but wasn't able to celebrate with her due to working the weekend. Darn work gets in the way of everything fun.

I can however tell you that our house smelled absolutely amazing after baking this cake. Zach said he could smell the chocolate immediately after getting out of his truck.

I told my mom she had to give me a full report of the cake. And these are the phrases she used to describe it: light and fluffy, moist, decadent, and overall just delicious. Love my mom's report, but you know how it is, moms never have a bad thing to say about something their child makes. But she tells me that I have piece waiting for me in the freezer so I can try it this weekend. I will give you the full scoop afterwards!

Chocolate Pound Cake

3 cups all-purpose flour
3 cups sugar
1/2 cup unsweetened cocoa
1 stick unsalted butter
1 cup shortening
1 1/4 cups milk
1/2 teaspoon baking powder
1 teaspoon vanilla
5 large eggs

1. Preheat the oven to 325 degrees. Line the bottom of your pan with parchment paper and spray the sides and bottom with baking spray--I had a decorative bundt pan so I used the Pam Baking spray and skipped the parchment paper.

2. In the bowl of an electric mixer, dry whisk the flour, sugar, and cocoa.

3. Gradually add the butter, shortening, and m ilk. Beat on medium speed until smooth.

4. Add the baking powder and beat until incorporated.

5. Still on medium speed, add the vanilla extract and then add the eggs, one at a time. Beating well after each addition.

6. Pour the batter into the prepared pan and bake for 1 1/2 hours or until a toothpick inserted in the center comes out clean.

7. Cool the cake in the pan for 10 minutes. Level off the top of the cake using a bread knife before flipping the cake out of the pan.

8. After the cake has completely cooled, you can dust with powdered sugar. I chose to drizzle a little ganache over the top. Caramel would be a delicious option as well. Really, the options are endless.

Source: All Cakes Considered by Melissa Gray

Thursday, February 10, 2011

Hostess Cupcakes


Well, well, well, another chocolate cupcake recipe that disappoints. Through out all of our chocolate cupcake troubles, Michele and I have come up with three criteria that would lead us to the perfect chocolate cupcake. We named it the trifecta to perfecta-- moisture, structure, and chocolaty goodness! Usually a recipe meets one or two of the standards, but lacks in the third area. As was the case here. This recipe was outstanding as far as chocolate flavor and structure, but was very dry. The weird thing is that when Zach and I taste tested them the night they were baked they were perfect, but the following day they were dry as could be.

I am just baffled by how chocolaty these cupcakes tasted with such a small amount of cocoa. We have made previous recipes with three times as much cocoa and they all ended up lacking the chocolaty-ness factor.

Well it is a good thing these cupcakes look so darn good on the outside. Being that the cupcake isn't anything grand and they don't have the typical cream filling like the original hostess cupcakes. When I tried to inject the cream filling into the cupcakes using a pastry bag I met complete resistance- even causing a few of them to crack down the middle. I probably should have just cut a hole out of the tops and squirted in the cream filling, but for some reason that night I didn't feel like going through the bother. Maybe next time...


And this is the one I made especially for Zach. I know, pretty cheesy, huh?

Source: Annie's Eats

Monday, February 7, 2011

Gooey Good Bars

What's in a name? You would think with the word "gooey" in the title that this would be an instant hit. While it was well received by the audience, I was disappointed. I am my own worst critic. It definitely did not live up its title. I was expecting peanut buttery ooey gooey goodness but that is not what I got. I'm sure at this point you aren't interested in the recipe, but here it is. Like I said, everyone else loved them (and my adaptations-keep reading)


1 cup brown sugar
1/2 cup shortening
1/2 peanut butter
1 egg
1 tsp vanilla
1 1/2 cups flour
1 tsp baking soda
1/2 cup oatmeal

Frosting:
1 tbsp butter
2 tbsp peanut butter
1 1/2 cups powdered sugar
2 tbsp milk

Cream together first five ingredients. Stir together flour, soda, and 1/4 tsp salt. Add to creamed mixture, mixing well. Stir in oatmeal. Pat firmly into a greased 15x10x1 inch baking pan. Bake at 375 degree for 12-15 minutes. Cool and frost with a mixture of the remaining ingredients.


Clearly, from the picture you can tell that I didn't follow this recipe exactly. I made these bars in a 9x13 inch pan and they were a little past done at 12 minutes. I can't imagine what they would have been like had the dough been spread even thinner in a 15x10 inch pan. I didn't have any powdered sugar in the house to make the frosting so I improvised. After I took the pan out of the oven. I threw most of a bag of dark chocolate chips over the bars. I let it sit for a couple minutes to melt. In the meantime I took about 1/2 cup of peanut butter and melted it for about 20-30 seconds in the microwave. I drizzled this over the chocolate chips. By now the chips had melted so I spread the PB/chocolate mixture over the bars. I'm convinced that this frosting saved the recipe. Had the bars been baked a few minutes less this recipe could have been a winner. For now, I'm sure I will move on. There are plenty more PB/choc recipes out there to tackle.
Until then,

Bake on!
-M

Source: http://cookie.betterrecipes.com/gooey-good-bars.html

Striped Delight

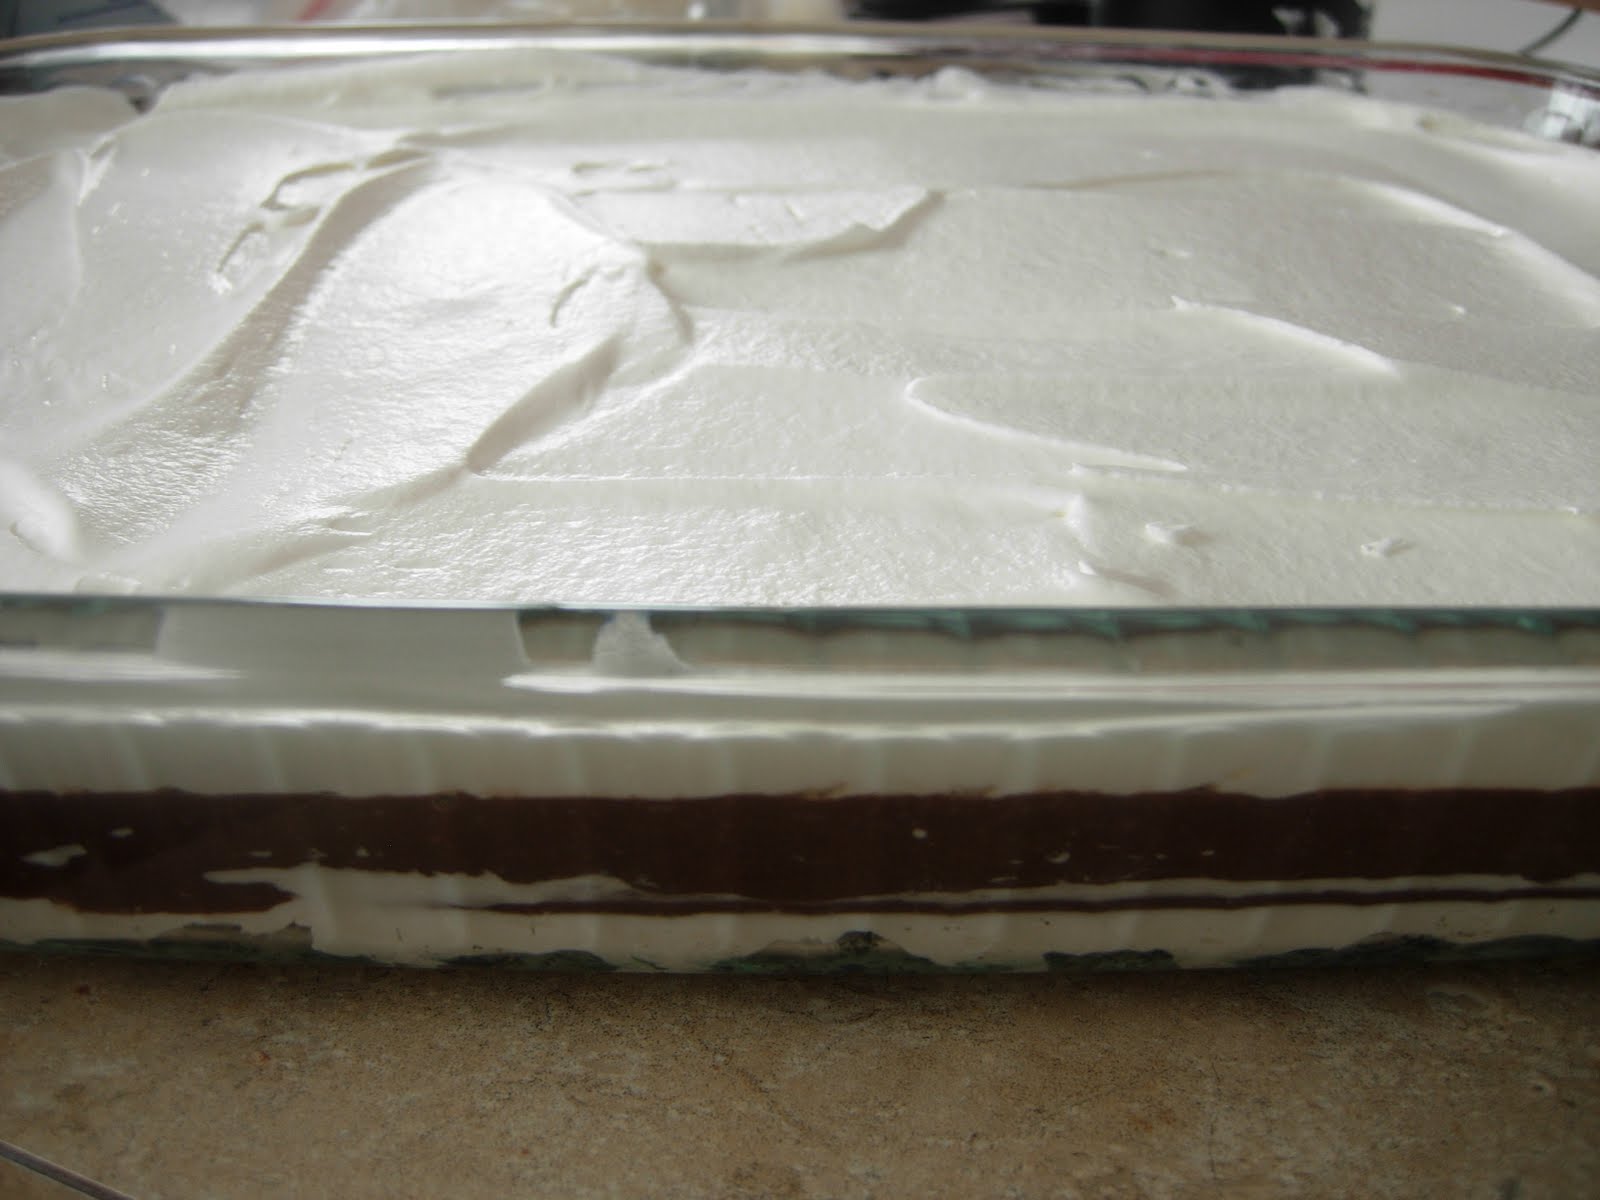
You know how you go on vacation and the pictures just never seem to do the destination justice. Well same goes for this photo. This picture just doesn't do it justice. This dessert is so delightful I could quite possibly, during a weak moment, consume this whole 9x13. Yum. I have some leftover in my fridge and it is taking every fiber of my body not to take a spoon and dig in. Darn diet. Tomorrow, it is on a one way trip to my work and into the bellies of my coworkers. I doubt there will be any complaints. Between Jess and I we keep the staff well fed. Okay, since you are all dying to make this for your next get together here goes:


35 Oreos, finely crushed
6 Tbsp butter or margarine, melted
1 8oz pkg cream cheese, softened
1/4 cup sugar
12oz Cool Whip topping, thawed
31/4 cup + 2 Tbsp cold milk
2 pkg -4oz size Jell-O chocolate flavor instant pudding


1. Mix crushed cookies and butter in medium bowl. Press firmly onto bottom of 9x13 inch baking dish. Refrigerate 10 minutes.
2. Beat cream cheese, sugar, and 2 Tbsp milk with wire whisk until well blended. Gently stir in 1 1/4 cups of the whipped topping. Spread over crust.
3. Pour 3 1/4 cups milk into a large bowl. Add dry pudding mixes. Beat with wire whisk 2 minutes or until well blended. Pour over cream cheese layer.
4. Let stand 5 minutes or until thickened. Drop remaining whipped topping by spoonfuls over pudding layer. Spread evenly to cover the pudding.
5. Refrigerate at least 4 hours.
Get your spoon ready, people!!
Bake on!
-M

Sunday, January 23, 2011

M-I-C-K-E-Y M-O-U-S-E


This Mickey Mouse cake was made for my nephew Luke's 2nd birthday. Luke is a big fan of Mickey. He is also a big fan of Buzz Lightyear so I'm just glad my sister went with the Mickey theme for his birthday. I can't imagine putting together a Buzz cake. Don't' get me wrong. I would've accepted that challenge.
My husband and I just got home from his birthday party. Oh it was so much fun. I just have to say that I went in full spirit with my Minnie Mouse shirt on. Luke saw his cake got the cutest little smile on his face and kept saying over and over, "Mickey cake!" while gave Mickey a little pat on the cheek. Thank goodness fondant can maintain the integrity of the cake. I wish I had a picture of him and his cake. I'm sure my sister does. Too darn cute. I asked his older brother Rhett what he wanted for his birthday thinking that he might have changed his mind, but he hasn't. He still wants a repeat of his last birthday cake... a Nemo cake which can be seen in an earlier blog post. Of course at the end of the night I turned to my sister and brother-in-law and asked what the theme is for their next son, Owen's birthday who will turn 1 in June. I just love those three little boys.
I'm so sad to say that I didn't have Jess helping me on this project. I really missed not baking and assembling with her. I really could have used her help. In the end the project turned out quite well. Someone even told my sister at the party that I should start selling them. At that time my sister informed her that I (we) do!
To make the Mickey cake I made one 10 inch cake and two 6 inch cakes. I cheated just a little and made the ears from 2 boxes of vanilla cake mixes and store bought frosting. The 10 inch cake was homemade. I used the chocolate cake recipe from the chocolate cake with PB frosting that Jess blogged about in an earlier post. This chocolate cake is so moist and delicious. The only problem is that it is so moist and delicate that it can be challenging for a novice to assemble a layer cake using this recipe. For the filling on all of the cakes I made whipped ganache and to it I added finely crushed mint oreos. I covered the chocolate cake with a really delicious chocolate frosting. I will blog about the frosting in an upcoming post. It sure was a find!
Everyone loved the taste! I got many compliments on the great moistness of the chocolate cake. While people could tell that the filling was mint they couldn't quite put their finger on what it was. The combination of the mint oreos and the whipped ganache made a really yummy filling. It certainly helped jazz up the plain boring boxed vanilla cakes.
Another Sweet Escape success.
Bake on!
-M

Saturday, January 15, 2011

Ladybug Cupcakes!


Had to challenge ourselves with doing three designs! As if working with fondant isn't enough of a challenge itself! It looked so cute though having a variety! Just hope we didn't cause a fight between any of the little girls at the birthday party! "I want that one!" "No, I wanted that one!" "Uh, there aren't anymore of that kind!"

These were chocolate cupcakes with chocolate frosting! And as far as the chocolate cupcake challenge, these were probably about as close as we have gotten to perfection. They had very good structure, texture, and moisture. Just have to figure out a way to make them a little more chocolatey. With the chocolate frosting they were perfect, but if the cupcake was every paired with a frosting other than chocolate the cupcake would be overpowered in an instant. We have one more trick up our sleeve to try. Stay tuned for the results....

Here is the recipe for the chocolate frosting though! It is absolutely delicious!! Yum yum!


Chocolate Frosting

6 tablespoons butter
2 teaspoons vanilla
3 cups powdered sugar
3/4 cup cocoa
1/3 cup milk (I had to add a little bit extra)

Cream butter and vanilla. In a separate bowl, combine powdered sugar and cocoa. Slowly add to creamed mixture. Add milk until the desired consistency is reached.

Tuesday, January 4, 2011

The Journey To Find The Ultimate Chocolate Cupcakes

Michele and I have been doing this whole "baking thing" for about six months now! And in that time we have only found a few absolute, without a doubt, go to cupcake recipes! The pumpkin and strawberry are about the only ones. At least we have two! But we still have a long ways to go with many, many more flavors to tackle. At this point chocolate and vanilla are our main culprits. With these two being the most common flavors that people want to order, there is a little more pressure to find that one amazing recipe.

For the past few months we have been focusing on chocolate. Between the two of us we have tried countless chocolate cupcake recipes. We have had a few failures, a few so-so, and a few that are do-able. It seems like there is always one part that just isn't quite up to par. Usually the downfalls are either not chocolaty enough or doesn't rise into a nice dome. And the most frustrating part is that the recipes we have tried have usually been deemed "the best chocolate cupcake." Not sure if we just have too high of standards or what the deal is.

Today I tried a chocolate cupcake that I found on Pink Parsley. It caught my eye last week when it was listed on the site as one of the most popular posts of 2010. I clicked on the link and the very first words were, "Not to be dramatic, but the search is over. These are quite possibly the most perfect cupcakes ever." And to top it all off it is a recipe from Cook's Illustrated!! A very reputable source.

Well here they are....


And the verdict is: Not overly impressed. They were a little dry, not chocolaty enough, and just didn't have that "wow factor." What a let down.

The journey continues. Dang it. I am so ready to move onto a new flavor, like pina colada or margarita or something a little more fun and exciting.

Luckily I have found another chocolate cupcake recipe that I want to try. It is from Barefoot Contessa, who I absolutely love! And the source that I found them on gave them 4.5/5 stars. Oh please let these be the magic ones.

Wednesday, December 15, 2010

Nothing Beats Peanut Butter and Chocolate!

As many of you may already know, I have a tendency of eating peanut butter by the spoonfuls! It actually has become kind of a problem. A daily problem. To the point where I have to mentally tell myself to look pass the peanut butter. I could easily sit down with a jar of peanut butter and a spoon and eat the whole darn thing. In fact, that would be pretty close to heaven for me!

Last night during my nightly routine of surfing the internet I stumbled across a new blog! I love, love, love when that happens! I spent several hours reading and bookmarking recipes from Bake at 350! I am in pure awe at her cookie decorating skills!

While I was browsing her blog I stumbled across the post for Peanut Butter Chip Bars and immediately started salivating! I needed to try these and I needed to try them now! First of all, what is better than peanut butter and chocolate? And second, look at her pictures of the bars! Specifically the middle of the bars!! Their gooeyness sucked me right in!


Peanut Butter Chip Bars

6 TBSP unsalted butter
1/2 c chunky peanut butter
1 c sugar
1/4 c light brown sugar, packed
2 eggs
1 tsp vanilla
1 c flour
1/4 tsp coarse salt
1 tsp baking powder
1 c chocolate chips

Preheat oven to 350. Lightly grease an 8 x 8" pan

Whisk together the flour, salt and baking powder. Set aside. Cream the butter and peanut butter together until smooth. Beat in the sugars until combined. Add the eggs, one at a time, scraping down the bowl after each addition. Stir in the vanilla.Stir in the flour mixture. Add the chocolate chips, stirring until combined.

Spread the batter into the prepared pan (you WILL want to lick the spoon...it's yummy!). Bake for about 30- 32 minutes. Cool completely before cutting.

Enjoy the Sweet Escape!
-Jess

Sunday, December 12, 2010

Mini-Mint Brownie Cups

These little guys are just so perfect. You can pop them into your mouth guilt free. Well, maybe not guilt free. But who doesn't love something in mini? My Mom first introduced me to this recipe years ago. We had to stop making it awhile back because we couldn't find the mint-chocolate chips that this recipe calls for. Then, botta bang there they were on the shelf this year. :) These are easy to make and always a crowd pleaser. For those of you who like the edges in the pan of brownies, you will really dig these. They have that little bit of crunchiness on the outside but are soft and chocolaty in the middle.

2 sticks butter or margarine
1 bag (10oz) semi-sweet mint chocolate chips
1 cup granulated sugar
4 large eggs
1 cup flour

1. Heat oven to 350 degrees. Arrange 36 (likely more) doubled mini-muffin baking cups (1 1/2inch) on cookie sheets with sides.

2. Melt butter in 3qt saucepan over medium-low heat. Add chocolate chips and stir until melted and smooth.

3. Remove from heat. Stir in sugar. Add eggs and stir briskly until blended. Stir in flour until blended.

4. Fill baking cups 3/4 full. Bake 20-25 minutes until tops look cracked and toothpick inserted in center has moist crumbs.

I never double the baking cups and always have success. I'll let you make that call for yourself.

Bake on!
-M

Chocolate Carmel Bars


These have to be one of my favorite bars. These bars take a bit of patience to make since they do have a few steps, but they are so worth the work. They are fantastic!! So, rich and gooey... you won't be able to say no.

2 1/4 cups flour
2 cups quick cooking oats
1 1/2 cups packed brown sugar
1 tsp baking soda
1/2 tsp salt
1 1/2 cups cold butter or margarine
2 cups semi-sweet chocolate chips
1 cup chopped pecans
1 jar-12oz caramel topping

In a bowl combine 2 cups flour, oats, brown sugar, baking soda and salt. Cut in butter until crumbly. Set 1/2 aside for topping. Press the remaining crumb mixture into a greased 9X13 pan. Bake at 350 degrees for 15 minutes. Sprinkle with chocolate chips and pecans. Whisk the caramel topping and remaining flour until smooth. Drizzle over the top. sprinkle with pecans. Sprinkle with reserved crumb mixture. Bake for 18-20 minutes or until golden brown. Cool for 2 hours before cutting.

To my coworkers... Yes! These are the bars that were at skills day on Nov 30th and Dec 1st.
Bake on!
-M

Wednesday, December 1, 2010

Marshmallow Crunch Brownies


These bars are oh so, so delicious. A guy at Zach's work deemed them "his favorite Jess treat!" They are the perfect combination of brownie, s'more, and rice krispie treats! Three of my favorite things! And the brownie was nice and fudgey! Yum-o!

Even though they were very tasty, I would make one change the next time I make them. I would highly recommend cutting the brownie portion of the recipe in half. This part of the bar was a little thick. Actually the bars were very thick overall. They came to the top of a cake pan, which is unusual for a cake, let alone bars. Cutting the brownie portion in half would help even out the portions of brownie, marshmallow, and rice krispie topping!

This recipe was found on The Brown Eyed Baker blog. This is the original recipe. The brownie portion has not been cut in half.

Marshmallow Crunch Brownie Bars

For the Brownie Base:
4 ounces unsweetened chocolate
2/3 cup unsalted butter
1¼ cups semisweet chocolate chips, divided
1-1/3 cups all-purpose flour
1 teaspoon baking powder
½ teaspoon salt
4 large eggs, at room temperature
2 cups granulated sugar
2 teaspoons vanilla extract

For the Toppings:
1 bag (10½ ounces) miniature marshmallows
1½ cups milk chocolate chips
1 cup smooth peanut butter (don’t use natural peanut butter)
1 Tablespoon unsalted butter
1½ cups Rice Krispies cereal

1. Preheat the oven to 350 degrees F. Grease a 9×13-inch pan.

2. For the brownies: In a medium saucepan, melt the unsweetened chocolate, butter and ¾ cup of the semisweet chocolate chips over medium heat. Stir occasionally while melting. Set aside and cool for 5 minutes.

3. In a medium bowl sift the flour, baking powder and salt. Set aside. In a large bowl , whisk the eggs thoroughly. Add the sugar and vanilla and whisk until well blended. Stir the melted ingredients into the egg mixture, mixing well. Stir in the dry sifted ingredients and mix well. Fold in the remaining ½ cup semisweet chocolate chips.

4. Pour the batter into the prepared pan, smoothing the surface with a spatula. Bake for 25 to 30 minutes, or until a cake tester inserted into the corner of of the pan comes out with moist crumbs.

5. Remove the brownies from the oven and immediately sprinkle the marshmallows over them. Return the pan to the oven for 3 more minutes.

6. Meanwhile, place the milk chocolate chips, peanut butter, and tablespoon of butter in a medium saucepan. Melt over low heat, stirring constantly, until completely melted. Remove from heat, add the Rice Krispies and mix well. Allow to cool for 3 minutes.

7. Spread the mixture evenly over the marshmallow layer. Refrigerate until chilled before cutting.

Monday, November 29, 2010

Divine Chocolate Cake


This divine chocolate cake is perfect for dark chocolate lovers. It is a one layered, rich, fudge cake. This is not your typical spongy cake. It is dense and unexpected. While it isn't one of my favorites, I can certainly see a bunch of little old ladies enjoying this with a cup of decaf in the afternoon. Don't get me wrong... it has a really good flavor. I just was hoping for a spongy cake based on the picture I saw and instead got a dense, fudge cake. I snagged this recipe from mixingbowl.com.


18oz bittersweet chocolate, broken into pieces


3/4 cup unsalted butter


1 tablespoon vanilla


5 eggs


1 cup sugar


6 tablespoons whipping cream


6 tablespoons corn syrup


1 cup sliced almonds, toasted


1. Preheat oven to 350 degrees. Grease a 9-inch springform pain. Line the bottom of the pan with parchment paper or waxed paper. Grease and lightly flour paper.


2. In a medium saucepan, combine 10 ounces of the chocolate and the butter. Cook and stir over medium-low heat until melted. Whisk in the vanilla. Cool.


3. In a large mixing bowl, beat eggs and sugar until tripled in volume, about 6 minutes. Gradually add chocolate mixture to egg mixture, stirring gently with a spatula until combined. Pour into the prepared pan.


4. Bake for 45 minutes. Place cake in pan on a wire rack. Using a small sharp knife, loosen cake from side of pan. Press top of cake down to make an even thickness; cool.


5. Remove sides of pan. If necessary, trim edges of cake. Invert cake onto a cake plate; set aside.


6. For glaze, in a medium saucepan, combine whipping cream and corn syrup. Heat over medium heat until mixture begins to simmer; reduce heat to low. Gradually add the remaining 8 ounces chocolate, whisking after each addition until smooth. Cool for 10 minutes. Pour glaze over cake; spread with spatula to completely cover cake. Press almonds onto sides of cake. Shill for at least 1 hour before serving. Makes 12-14 servings.


So, enjoy this one with the little old lady in your life...


P.S. I add the dollops of whipping cream and raspberries for overall appeal.


Bake on!


M


Sunday, November 14, 2010

Thee Best Cake Ever!

Sour Cream Chocolate Cake with Peanut Butter Frosting and Chocolate-Peanut Butter Glaze!!

Oh my god! This cake is by far the best cake we have ever made! It leaves me at a loss of words! Absolutely speechless! Can't even find words to describe to all of you how amazing it is!


I am seriously convinced that sour cream is the ultimate secret ingredient for baking! Every thing that I have made that includes sour cream has turned out absolutely wonderful! They always seem to turn out super moist, light, and fluffy! And this cake lived up to this theory as well!

Michele said it best when she said "it is the perfect marriage of flavors!" Neither the chocolate nor the peanut butter overpower the other. Rather the two compliment one another very well!

The recipe is from Sky High Irresistible Triple Layer Cakes. This is the first recipe that we have tried from this book, but being that this one turned out so well, I am super anxious to try some of the other ones!

Sour Cream Chocolate Cake
2 cups all-purpose flour
2 1/2 cups sugar
3/4 cup cocoa
2 teaspoons baking soda
1 teaspoon salt
1 cup vegetable oil
1 cup sour cream
1 1/2 cups water
2 tablespoons distilled white vinegar
1 teaspoon vanilla
2 eggs

Preheat oven to 350 degrees. Butter the bottoms oand sides of two 8-inch cake pans. Line the bottom of each pan with a round of parchment paper and butter the paper.

Sift the flour, sugar, cocoa, baking soda, and salt into a large bowl. Whisk to combine. Add the oil and sour cream. Gradually beat in the water. Blend in the vinegar and vanilla. Whisk in the eggs and beat until well blended. Divide batter among the two cake pans.

Bake for 30 to 35 minutes or until toothpick comes out clean. Let cool in the pans for about 20 minutes. Invert onto wire racks and carefully peel off the paper liners.

Peanut Butter Frosting
10 ounces cream cheese, softened
1 stick unsalted butter, softened
5 cups powdered sugar, sifted
1 cup smooth peanut butter

In a large bowl with an electric mixer, beat the cream cheese and butter until light and fluffy. Gradually add the powdered sugar one cup at a a time. Mix thoroughly after each addition and scrape down the sides of the bowl often. Continue to beat on medium speed until light and fluffy, about three to four minutes. Add the peanut butter and beat until thoroughly blended.

To frost the cake, place one layer, flat side up, on a cake stand. Spread about a cup of frosting evenly on the top. Place the other layer on the top and frost the top and sides of the cake with remaining frosting.

I had a difficult time getting the frosting to have a nice smooth finish due to it being slightly sticky. But it worked well to dip the spatula into a bowl of hot water and smooth the frosting.

Chocolate-Peanut Butter Glaze
10 ounces semisweet chocolate, coarsely chopped
3 tablespoons creamy peanut butter
2 tablespoons light corn syrup
1/2 cup half-and-half

In the top of a double broiler, combine the chocolate, peanut butter, and corn syrup. Cook, whisking often, until the chocolate is melted and the mixture is smooth. Remove from the heat and whisk in the half-and-half.

To decorate the cake, simply pour the glaze over the top of the cake, and using an offset spatula, spread it evenly over the top just to the edges so that it runs down the sides of the cake in long drips. Refrigerate, uncovered, for at least thirty minutes to allow the glaze and frosting to set completely


Well I think we have finally found our ultimate go-to chocolate cake recipe!! What a good feeling that is!!

This has by far been the best sweet escape ever!
-Jess

Saturday, November 13, 2010

More of Michele's Halloween Treats!

Jess and I made plenty of Halloween cupcakes this year. She has already posted some of them that we created together. I made more the next day for my nephews' Halloween party. Here are some featured creations that are a bit different that those that she has already posted.


This walrus cupcake was created on top of a chocolate cupcake with chocolate ganache. I dyed some cream cheese frosting blue to create his face. I pipped on some black eyes. His mouth is made out of a halved peach ring and his teeth are candy coated licorice bites.


This spider and web was created on top of a chocolate cupcake with chocolate ganache. I piped cream cheese frosting to create the web. The spider's body is made out of a milk dud, chocolate licorice and an m&m.


This little blue monster was created on top of a chocolate cupcake with chocolate ganache. I dyed some cream cheese frosting blue to create his face. Mini marshmallows were used to create his eyes and teeth. I quartered the marshmallows for his teeth. I created lips using chocolate licorice.


These cupcakes were inspired by a picture I saw in the MixingBowl.com Fall/Winter 2010 magazine. I made chocolate cupcakes with chocolate ganache. Then I piped on the mummy's wrappings using peanut butter cream cheese frosting. M&ms were used for the eyes.

Justin called this one my "Elmo" cupcake. It is a pumpkin cupcake that is layered with a mini pumpkin cupcake. I used pink dyed cream cheese frosting and gave this little guy a furry look. The orange nose is made out of a gum drop. The eyes are 2 large marshmallows with blue m&ms.


These cupcakes were loved by everyone at the party. I have a picture of 2 of my nephews standing on a chair next to the kitchen counter just staring at all of them. Priceless. I think my brother-in-law ate 3 of them that day. His favorite were the chocolate cupcakes with chocolate ganache that had cream cheese skeletons piped on them. Of course the kids at the party went crazy for all the monsters that were loaded with lots of delicious frosting. Another attendant of the party said that these were cuter and tasted better than a cupcake shop in the Twin Cities that charges $3-4 per cupcake. Kudos to us.

Bake on!
M

Thursday, November 11, 2010

White Chocolate Cupcakes with White Chocolate Frosting


A Pretty Dud
I recently purchased a cupcake cookbook while on a trip to SF. I was excited to try out my first recipe. So, here it is. Or here it isn't. Well, let's just say that I was more than disappointed. The cake batter looked more like cookie dough. The raw dough had a good flavor but when baked it was a dry little cake. It didn't leave me wanting more. It was lifeless and dense. So, not my idea of the perfect cupcake.

The frosting, on the other hand, was a success. It was more of a glaze than a frosting. It was timely to curl all of the individual little white chocolate curls, but so pretty if you have the time. I used my sifter to dust the chocolate with some powdered sugar. Really pretty. Now if only the cupcakes tasted good...

Bake on!
M