Showing posts with label Cream Cheese. Show all posts

Monday, May 2, 2011

Lemon Tart

First and foremost, I must apologize for my poor picture. The family had dug into it before I could snap a decent photo... and my tin foil stuck to the whip cream. Do not let looks deceive you. This tart is absolutely amazing. Remember when Jess was blogging about a baking bucket list...well making a tart/torte has been on my list for quite some time. When I spotted this recipe I knew that it would be a nice compliment to my family's Easter dinner. This is a perfect light lemony spring dessert. I honestly can't wait to make it again and taste spring at its best. I'm proud to say that not only was it a tasty success on my first attempt at a tart but I also get to cross it off my baking bucket list.

So what stood out for me when I came across this recipe? Well, I do love lemon. It ranks right up there with pumpkin. So my eye always gravitates towards lemon recipes. This recipe has a shortbread crust. I love the light buttery taste of shortbread. Paired with lemon, cream cheese, and homemade whip cream, I knew that this would be a hit.

Crust:
1 cup flour
1/3 cup powdered sugar
1/8 tsp salt
1/2 cup cold, unsalted butter

Lemon filling:
5 oz cream cheese, room temperature
1/2 cup sugar
1/2 cup lemon juice
2 eggs
1 Tbsp lemon zest

Topping:
1/2 cup heavy whipping cream
1 Tbsp powdered sugar


Preheat oven to 425 degrees. Grease a 8-9 inch tart pan with a removable bottom. In a food processor place the flour, sugar, and salt. Process to combine. Add the butter and pulse until the pastry starts to come together and form clumps. Place the pastry in the prepared tart pan and, using your fingertips, evenly press the pastry onto the bottom and up the sides of the pan. Pierce the bottom of the crust with the tines of a fork. Cover and place the pastry shell in the freezer for 15 minutes to chill.

When the pastry is completely chilled, place the tart pan on a large baking pan and bake until the crust is golden brown, about 13-15 minutes. Remove from oven and place on a wire rack to cool while you make the filling.

Reduce the oven to 350 degrees.

In a food processor or electric mixer, place the cream cheese and process until smooth. Add sugar and process until incorporated. Add eggs, one at a time, and process until thoroughly combined. Add remaining ingredients and process until well blended and smooth. Pour filling into pre-baked tart shell and bake for approximately 25-30 minutes or until filling is set. Transfer tart to a wire rack to cool, then cover and refrigerate until well chilled, at least an hour.

Beat the whipping cream and powdered sugar until stiff peaks form. Cover the lemon layer with the whipped topping. Refrigerate until ready to serve.

Source: Joy of Baking
This recipe has also been linked to Cupcake Apothecary A Theme Bakers Sunday #2. Theme: Lemon

Bake on!
Michele

Sunday, March 6, 2011

Buckeyes


Ever since I checked the book, Bake Explorations, out from the library, I have been dying to make this recipe. Chocolate+Peanut Butter+Cream Cheese+Graham Crackers=YUM! I knew with a list of ingredients like this it had to be a winning recipe. Apparently these treats are best known in Ohio where this candy resembles the horse chestnut from the Buckeye State. Living in Minnesota I have never heard of them, but sure do love em! They literally taste like you are eating peanut butter cookie dough wrapped in chocolate. The insides are light and soft just like cookie dough. One of my coworkers said it best when she said, "these are better than sex balls" as she kept popping them in her mouth. Too funny. I know there was more than one person who was having a hard time having just one. Warning: these may cause you to overindulge.

1/4 cup cream cheese, softened
1 1/2 cups peanut butter
1 cup graham cracker crumbs
3 cups confectioners' sugar
10 tbsp unsalted butter, melted and cooled
12 oz good-quality dark chocolate

In the bowl of a standing mixer fitted with a paddle attachment, beat the cream cheese and peanut butter until combined. Add the graham cracker crumbs and beat on medium speed for 10 seconds. Add the confectioners' sugar and butter. Beat at low speed for 20 seconds to prevent the sugar from spilling over; then gradually increase the speed until the mixture is completely combined. Scrape down the sides and bottom of the bowl and beat again. The mixture will feel slightly dry. Set the peanut butter filling aside while you melt the chocolate.

In the top of a double boiler set over hot water, melt the chocolate, stirring frequently until it is completely smooth. pour the chocolate into a small, deep bowl. Let it cool to tepid (about 100 degree) while you shape the peanut butter centers.

Line a sheet pan with parchment paper. Scoop out slightly more than 1 tablespoon's worth of filling and use your hands to form it into a ball. Place the ball on the prepared sheet pan and repeat the process until all the filling has been shaped. The balls can sit fairly close to each other on the sheet, just make sure they are not touching.

One by one, use a fork or large skewer, dip each ball into the chocolate. Roll the ball around from side to side to cover almost the entire peanut butter center, leaving a small part uncovered. Manipulate the buckeye so that the dripping chocolate covers the holes made by the fork. Let the excess chocolate drip back into the bowl and return each chocolate-covered buckeye to the pan. Refrigerate the entire sheet pan for about 30 minutes to set the chocolate before serving.
Bake on!
-Michele

Sunday, February 20, 2011

Happy 30th Birthday Brian

This cake was made for my friend Katie's fiance, Brian. Brian turned 30 this year so he needed a cool cake. My first instinct was to make him a round cake with the Wild logo on it- Minnesota's professional hockey team. Katie had arranged a surprise party for Brian. Let me start over, the party itself wasn't a surprise, but taking a limo to the Wild game with 11 of his closest friends instead of having a party at their home was. After a long debate, I decided that I didn't want to risk him putting 2 and 2 together and figure out that we were going to the Wild game. So, my next thought was to make him a Coors Light cake as this is his beer of choice and he loves his beer. I was fully dedicated to making him this cake until the night before I was going to start baking, when I decided that it was too big of a project to tackle without Jess here to help. So, my husband and I came up with a third option, a duck hunting cake. Duck hunting is one of Brian's favorite things to do. Perfect! I had an idea. Now to execute. Katie and Brian told me that they had recently had a red velvet cake with white chocolate filling and cream cheese frosting. So, this was my mission. I turned to Yes, Divas Can Cook for a recipe for a red velvet cake. I will admit that it took me all of my 28 years before I tasted red velvet cake. I know. I know. You can gasp here. What makes it challenging then is to know whether you have a good recipe on your hands. I made this recipe into cupcakes and had Jess taste test them for me prior to making this cake. She said that they were moist but that it didn't seem as chocolaty has her Mom's recipe. So, I took this recipe and added one more tablespoon of cocoa powder. It turned out beautifully though the extra tablespoon of cocoa did dull the bright red color a bit.


2 cups all purpose flour
1 tsp baking soda
1 tsp baking powder
1 tsp salt
2 tablespoons unsweetened cocoa powder
2 cups sugar
1 cup vegetable oil
2 eggs
1 cup buttermilk
1 tsp white distilled vinegar
2 tsp vanilla
2-3oz red food coloring
1/2 cup prepared hot plain coffee


1. In a large bowl mix together the flour, baking soda, baking powder, salt, and cocoa powder. Whisk until combined. Set aside.

2. In a separate large bowl, mix the sugar and oil together.

3. Add in eggs, buttermilk, vanilla and red food coloring. Stir until combined.

4. Next add coffee and vinegar. Stir until combined.
5. Pour the flour mixture into the sugar mixture a little at a time, beating until well combined.

6. Pour the batter into two greased and floured 9-inch round cake pans. Bake 30-40 minutes at 325 degrees or until a toothpick inserted in the center comes out clean.

7. Allow the cakes to cool in the pan for 10-15 minutes. Then remove them from the pan and allow them to finish cooling on a wire rack.

I should let you know that I did end up using 3oz of red food coloring. I'm sorry to say that I don't have a picture of the inside of the cake. While it wasn't bright, bright red, it ended up having a solid red color. I was pleased. Now to tackle the filling.

I have never used white chocolate as a filling so I again had to search for a recipe. I ended up finding this recipe for white chocolate frosting. This filling/frosting had such a good rich vanilla chocolaty flavor. It tasted sooooo good. Somewhere along the way, my execution failed however. I'm convinced that the error occurred when the eggs were beating. I'm not sure if a bit of yolk was mixed or what the deal was, but those babies would not whip up. I should have stopped right then and there. I know better than that. For some insane reason I went ahead with the recipe and then ended up with a runny filling. I will likely try to one again, making sure that the egg whites are fluffy before I continue. :)


1 cup sweetened condensed milk
8 Tbsp unsalted butter
8oz white chocolate chips
3 large egg yolks
1 cup confectioners sugar

Hahaha. Okay well at least I can laugh about it now. I was supposed to use egg yolks NOT the whites. Oooops. No wonder it didn't work.


Continuing on...

To make the frosting, heat the sweetened condensed milk, butter and chocolate chips in a saucepan over medium heat. Cook, stirring occasionally, until the chocolate chips melt. Remove from heat and let cool.

In a mixing bowl, beat together the egg yolks and confectioners' sugar with an electric mixer until fluffy.

Add the chocolate mixture and mix until thick.

I spread this between the two 9X13 sheets of red velvet. Then I covered the whole cake with cream cheese frosting. Yum. There were some hiccups along the way, but all in all I think my first red velvet cake turn out pretty well.

Now for the fondant...
So, this the part where my husband became quite involved and boy was I thankful. Not only did he make 2-3 runs to the local grocery store when I ran out of ingredients during the project (do to the frosting failure) but he took the time to create the silhouette scene with me. Him and Brian often go duck hunting together, along with our dog, Jack. This scene perfectly depicts that. Justin was so proud. Together we looked up ducking hunting decals online. He helped me (more like insisted that I) place the ducks in the right position for landing which is when a hunter would shoot at them as shown in the scene. Likely the average person wouldn't have notice this and maybe not even a hunter, but it was so cute seeing him get all involved in one of my projects. So we printed out a bunch of decal images. Justin cut them all out for me and then we taped them together to create the scene. Not to shabby, huh? I laid the paper cut-out on my fondant and went about the tedious task of cut out the silhouette. It all turned out perfectly except my paper stuck a bit to the fondant in a few spots and pulled a bit up when I removed it. It upset a perfectionist like me, but I took a few deep breaths and moved on. For the background, I had covered the cake in white fondant. Then I took a bottle of orange and yellow Wilton Color Mist and created the sunrise scene. I dipped my fingers into a few drips of red food coloring to add a few touches of a deeper color here and there. The few ducks up the top right corner of the cake were drawn by yours truly using a black edible marker.

Brian was utterly surprised when I showed him the cake. Everyone at the party was amazed. I think some even Twittered about it. Ahhh, feels so good. Another sweet success.

Bake on!
-M

Monday, February 7, 2011

Striped Delight

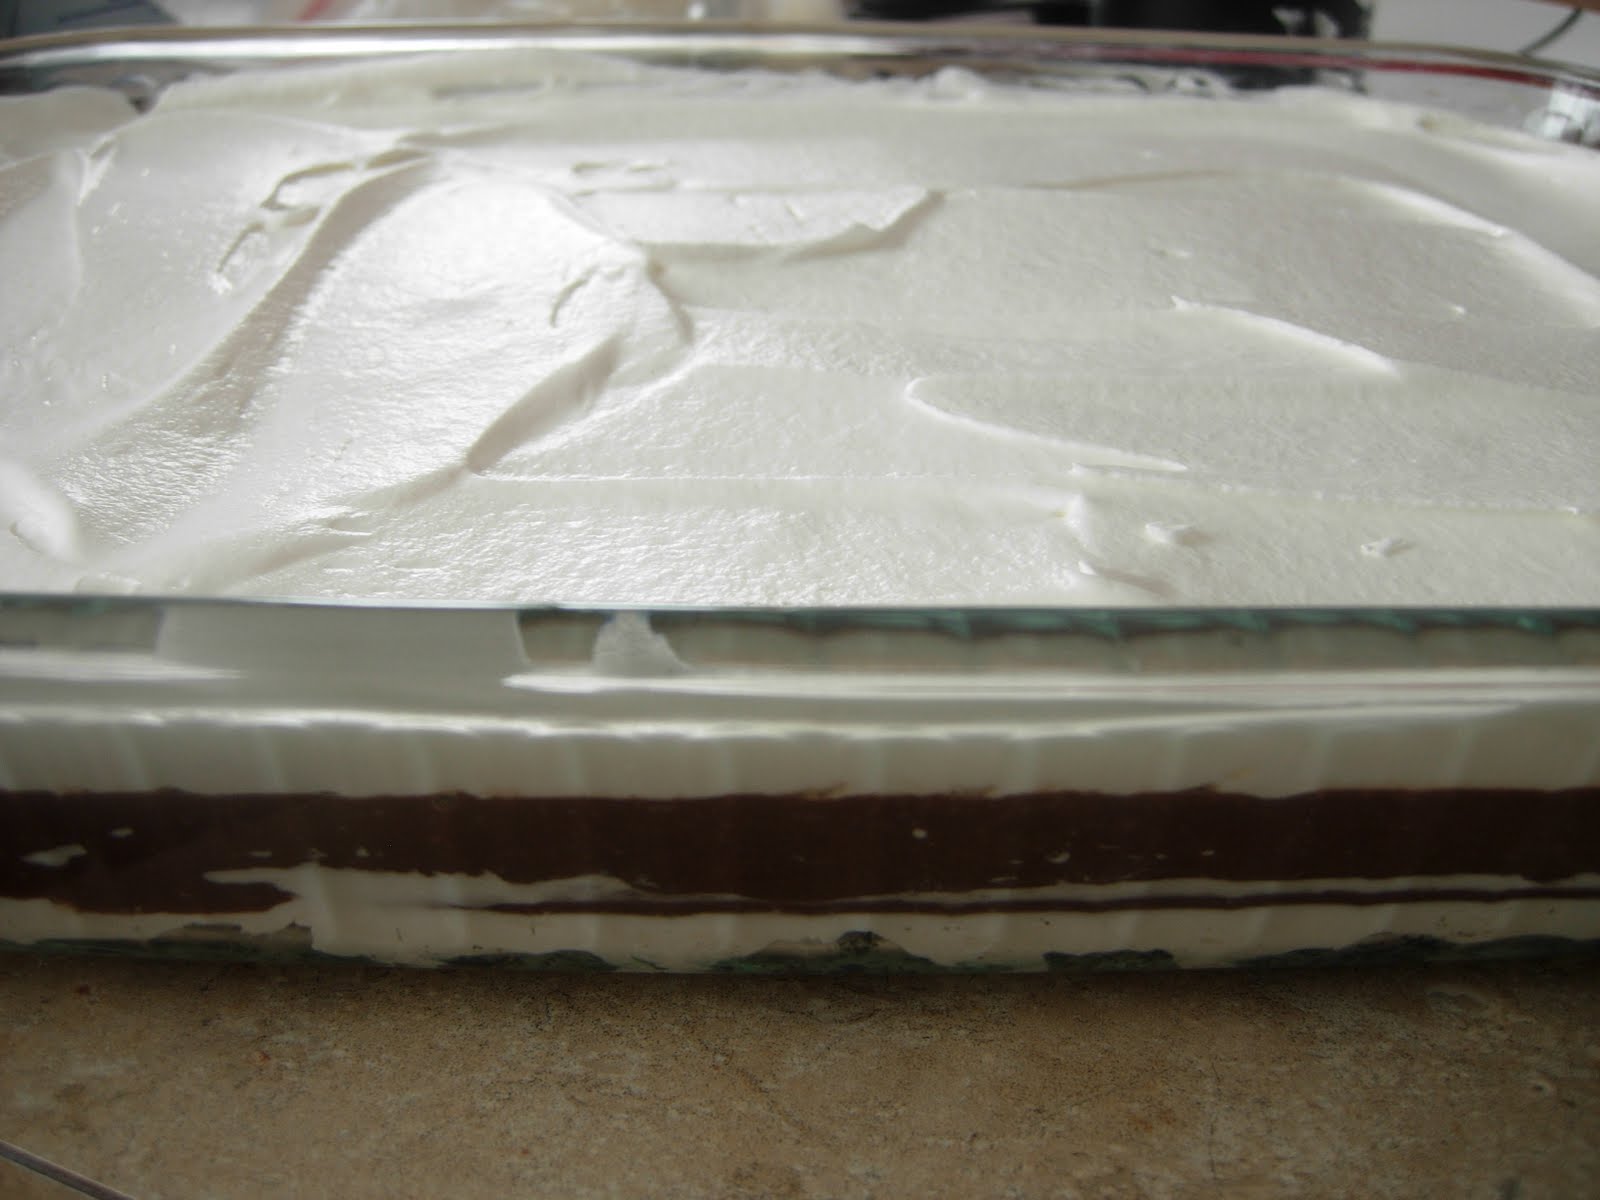
You know how you go on vacation and the pictures just never seem to do the destination justice. Well same goes for this photo. This picture just doesn't do it justice. This dessert is so delightful I could quite possibly, during a weak moment, consume this whole 9x13. Yum. I have some leftover in my fridge and it is taking every fiber of my body not to take a spoon and dig in. Darn diet. Tomorrow, it is on a one way trip to my work and into the bellies of my coworkers. I doubt there will be any complaints. Between Jess and I we keep the staff well fed. Okay, since you are all dying to make this for your next get together here goes:


35 Oreos, finely crushed
6 Tbsp butter or margarine, melted
1 8oz pkg cream cheese, softened
1/4 cup sugar
12oz Cool Whip topping, thawed
31/4 cup + 2 Tbsp cold milk
2 pkg -4oz size Jell-O chocolate flavor instant pudding


1. Mix crushed cookies and butter in medium bowl. Press firmly onto bottom of 9x13 inch baking dish. Refrigerate 10 minutes.
2. Beat cream cheese, sugar, and 2 Tbsp milk with wire whisk until well blended. Gently stir in 1 1/4 cups of the whipped topping. Spread over crust.
3. Pour 3 1/4 cups milk into a large bowl. Add dry pudding mixes. Beat with wire whisk 2 minutes or until well blended. Pour over cream cheese layer.
4. Let stand 5 minutes or until thickened. Drop remaining whipped topping by spoonfuls over pudding layer. Spread evenly to cover the pudding.
5. Refrigerate at least 4 hours.
Get your spoon ready, people!!
Bake on!
-M

Wednesday, December 1, 2010

Pumpkin Cream Cheese Muffins


Aren't you surprised?!? Another baked good with pumpkin!! And it probably won't be the last considering I stocked up on pumpkin and have about fifteen cans in the cupboard :) Probably a little extreme, but I wanted to be prepared just in case there is another pumpkin shortage. Don't want to be scrambling and going from store to store in search of pumpkin like I was a few months ago.

As in the words of Zach's aunt, "these are damn good!" I must say I agree with that statement! I was a little disappointed when I took my first bite, but I had to remind myself that these were muffins and not cupcakes. I have gotten so used to taste testing cupcakes that I was expecting a little more sweetness when I bit in. But for a muffin, the streusel topping added just the right amount of sweetness to the pumpkin and spice. I sure am a sucker for anything with a streusel topping. And the little bit of cream cheese in the middle is the perfect surprise! Like my sister-in-law said, "it's like the frosting is in the middle!"

I found this recipe on Annie's Eats, one of the many food blogs that I read daily! She has so many mouth watering recipes and pictures. I have a hard time picking which one to make first!


Pumpkin Cream Cheese Muffins


Ingredients:
For the filling:
8 oz. cream cheese, softened
1 cup confectioners’ sugar

For the muffins:
3 cups all-purpose flour
1 tsp. ground cinnamon
1 tsp. ground nutmeg
1 tsp. ground cloves
1 tbsp. plus 1 tsp. pumpkin pie spice
1 tsp. salt
1 tsp. baking soda
4 large eggs
2 cups sugar
2 cups pumpkin puree
1¼ cups vegetable oil

For the topping:
½ cup sugar
5 tbsp. flour
1½ tsp. ground cinnamon
4 tbsp. cold unsalted butter, cut into pieces

Directions:
To prepare the filling, combine the cream cheese and confectioners’ sugar in a medium bowl and mix well until blended and smooth. Transfer the mixture to a piece of plastic wrap and shape into a log about 1½-inches in diameter. Smooth the plastic wrap tightly around the log, and reinforce with a piece of foil. Transfer to the freezer and chill until at least slightly firm, at least 2 hours.

To make the muffins, preheat the oven to 350˚ F. Line muffin pans with paper liners. In a medium bowl, combine the flour, cinnamon, nutmeg, cloves, pumpkin pie spice, salt and baking soda; whisk to blend. In the bowl of an electric mixer combine the eggs, sugar, pumpkin puree and oil. Mix on medium-low speed until blended. With the mixer on low speed, add in the dry ingredients, mixing just until incorporated.

To make the topping, combine the sugar, flour and cinnamon in a small bowl; whisk to blend. Add in the butter pieces and cut into the dry ingredients with a pastry blender or two forks until the mixture is coarse and crumbly. Transfer to the refrigerator until ready to use.

To assemble the muffins, fill each muffin well with a small amount of batter, just enough to cover the bottom of the liner (1-2 tablespoons). Slice the log of cream cheese filling into 24 equal pieces. Place a slice of the cream cheese mixture into each muffin well. Divide the remaining batter among the muffin cups, placing on top of the cream cheese to cover completely. Sprinkle a small amount of the topping mixture over each of the muffin wells.

Bake for 20-25 minutes. Transfer to a wire rack and let cool completely before serving.

Saturday, November 13, 2010

More of Michele's Halloween Treats!

Jess and I made plenty of Halloween cupcakes this year. She has already posted some of them that we created together. I made more the next day for my nephews' Halloween party. Here are some featured creations that are a bit different that those that she has already posted.


This walrus cupcake was created on top of a chocolate cupcake with chocolate ganache. I dyed some cream cheese frosting blue to create his face. I pipped on some black eyes. His mouth is made out of a halved peach ring and his teeth are candy coated licorice bites.


This spider and web was created on top of a chocolate cupcake with chocolate ganache. I piped cream cheese frosting to create the web. The spider's body is made out of a milk dud, chocolate licorice and an m&m.


This little blue monster was created on top of a chocolate cupcake with chocolate ganache. I dyed some cream cheese frosting blue to create his face. Mini marshmallows were used to create his eyes and teeth. I quartered the marshmallows for his teeth. I created lips using chocolate licorice.


These cupcakes were inspired by a picture I saw in the MixingBowl.com Fall/Winter 2010 magazine. I made chocolate cupcakes with chocolate ganache. Then I piped on the mummy's wrappings using peanut butter cream cheese frosting. M&ms were used for the eyes.

Justin called this one my "Elmo" cupcake. It is a pumpkin cupcake that is layered with a mini pumpkin cupcake. I used pink dyed cream cheese frosting and gave this little guy a furry look. The orange nose is made out of a gum drop. The eyes are 2 large marshmallows with blue m&ms.


These cupcakes were loved by everyone at the party. I have a picture of 2 of my nephews standing on a chair next to the kitchen counter just staring at all of them. Priceless. I think my brother-in-law ate 3 of them that day. His favorite were the chocolate cupcakes with chocolate ganache that had cream cheese skeletons piped on them. Of course the kids at the party went crazy for all the monsters that were loaded with lots of delicious frosting. Another attendant of the party said that these were cuter and tasted better than a cupcake shop in the Twin Cities that charges $3-4 per cupcake. Kudos to us.

Bake on!
M

Saturday, October 23, 2010

Who knew you could make pumpkin cream cheese cupcakes better!

This cupcake is a member of the variety pack that Jess most recently blogged about. I used the pumpkin cupcake with cream cheese frosting recipe that she had blogged about this summer. To the recipe of cream cheese frosting I added 1 tsp cinnamon, 1/2 tsp ground ginger, 1/2 tsp grated nutmeg and 1/4 tsp ground cloves. I then ran some cinnamon through my sifter for a nice cinnamon dusting (though my picture above does not reflect this step). The spice additions were more subtle than I thought they were going to be. I was afraid the frosting was going to compete with the cupcake but they were a nice marriage of flavor. I know they gals on the night shift thought they were a tasty treat!
Another Sweet Escape success!

Bake on!
-M

Saturday, September 25, 2010

Whoopie Pies

It is nightly routine for me to sit in bed with my laptop and browse the internet for an hour or two before going to bed. Usually this consists of checking my email, facebook, and then my favorite baking blogs. A few nights ago I stumbled upon a new blog, A Baked Creation! I love when this happens! Ultimately it means new recipes to try!! The hardest part is deciding which recipe I want to try first!

One of the most recent posts on this blog was for classic chocolate whoopie pies. Zach happened to look over at the computer when I was reading this post and his first words were "those look pretty darn good." I decided to be a nice and sweet wife and make them for him the following day. Plus we were going to Stillwater that weekend with my family and I only like making sweets when I know I have someone I can dump them on! Lord knows I can't keep any sweets around this house because I have no self-control and end up eating all of them!

Michele came over and we had a fun afternoon of baking and girl talk! Nothing could be better!

It worked pretty slick to use my cookie scoop! This way all of the cookies would be similar in size and make it easy to sandwich!

And at this point the house smelt utterly amazing! Nothing is better than the smell of chocolate! The cookies turned out wonderfully but I thought they would be a little more fluffy and cake-like. Don't get me wrong though, they tasted very good!

Now for the fun part, putting the filling between the cookies! Being that I was making these as a special treat for Zach I decided to use my cream cheese frosting as the filling. Zach thinks that my cream cheese frosting should be put on every single cupcake that I make.

Michele was a master sandwicher!

Half way through we decided to switch up the filling a little bit. We melted some semi-sweet baker's chocolate and added it to the cream cheese frosting! Personally I liked this filling the best!!

Well I think it is time to buy the whoopie pie cookbook!!

Sunday, July 18, 2010

Mmmm Pumpkin!

Who doesn't love pumpkin?!? I love pumpkin pie, pumpkin bars, and pumpkin bread so I figured pumpkin cupcakes had to be good too! Dang was I right! The pumpkin cupcakes with cream cheese frosting were sooo good. The cupcake recipe was from Taste of Home and the frosting recipe was from one of my favorite blogs, Oh, Just Put A Cupcake In It.

The cupcakes were soft and moist with just the right amount of spice. And this could quit possibly be the best cream cheese frosting I have ever tasted. It had the perfect proportion of cream cheese and powder sugar. Pair the two together and it was like taking a bite of heaven!


Pumpkin Cupcakes

2 cups sugar (I used 1 cup white and 1 cup light brown sugar)
3/4 cup oil
1 15 oz can pumpkin (not pie mix)
4 eggs
2 cups flour
2 tsp baking soda
1 tsp baking powder
1 teaspoon salt
1 teaspoon pumpkin pie spice

Preheat oven to 350. In small bowl, mix together flour, baking soda, baking powder, salt, and pumpkin pie spice. In large mixing bowl, combine sugar, oil, pumpkin, and eggs. Mix on medium until well combined. Mix in dry ingredients and beat until well mixed. Fill muffin cup up 2/3 full, bake 18-22 minutes.


Cream Cheese Frosting

1 8 oz softened cream cheese
2 sticks unsalted butter, softened
6 cups sifted powdered sugar
pinch salt
1 tsp vanilla
splash cream

Cream together cream cheese and butter, add sugar, vanilla and salt and beat until creamy. Check your consistency...if you want it thinner, add a splash of cream and beat well to combine.