Sunday, September 18, 2011

Beer Mug Cake


The 21st birthday cake I made for my brother!! It was super easy! Just baked a 9x13 cake and rounded the top edges a little!

Wednesday, September 7, 2011

Caramel Filled Brownies


Prior to making these brownies, peanut butter and chocolate had always been my favorite dynamic desert duo. But that all changed after one bite of these brownies! Caramel and chocolate snuck up from behind and is now in the runnings for my favorite duo.

Warm brownies, gooey caramel, and a scoop of ice cream! Need I say more? Off to heaven I go!

Caramel Filled Brownies
1 cup unsalted butter
12 ounces bittersweet chocolate, coarsely chopped
1 1/2 cups sugar
4 eggs
1 tablespoon vanilla
1 1/4 cup flour
1 cup chocolate chips

filling:
14 ounces candied caramels, unwrapped
1/3 cup heavy whipping cream

Preheat the oven to 350˚ F. Grease 9x13 pan with cooking spray. Combine the butter and chocolate in a heatproof bowl set over a pan of simmering water. Heat, stirring occasionally, until completely melted and smooth. Remove the bowl from the heat. Whisk in the sugar, eggs and vanilla until incorporated. Stir in the flour until combined. Spread about half of the brownie batter in the bottom of the prepared pan. Bake for 20 minutes. Remove from the oven and let cool for 20 minutes.

To make the caramel filling, combine the caramel candies and cream in a medium saucepan over medium-low heat. Heat, stirring frequently, until melted and smooth. Immediately spread the caramel mixture over the bottom brownie layer. Pour the remaining brownie batter over the caramel layer, taking care to pour and spread it evenly otherwise it will be difficult to spread evenly over the caramel layer. Sprinkle the chocolate chips on top of the final brownie layer. Bake for 20 minutes. Transfer to a wire rack and let cool completely before slicing and serving.

Source: Annie's Eats

Sunday, August 28, 2011

Zucchini Bread

Yes, another zucchini recipe! This bread is one of the main reasons that I made zucchini a part of our garden this year! It was the first thing I made after picking our first two zucchini.

Zach isn't a huge zucchini fan and won't eat any kind of baked good that has zucchini in it. So ya know what that means, I had all three loaves to myself! And I didn't mind a bit!

Zucchini Bread
3 eggs
1 cup oil
2 cups sugar (1 1/2 cups for muffins)
1 1/2 tsp. cinnamon
1/2 tsp. nutmeg
1 tsp. salt
1 tsp. baking powder
1 tsp. baking soda
1 cup raisins ( I don't put them in)
1 cup walnuts. chopped
2 cup zucchini, grated or shredded
1 can (8 1/4 oz) crushed pineapple, well drained
3 cups flour
Beat eggs with electric mixer. Add oil, sugar, cinnamon, nutmeg, salt, baking powder, baking soda; beat all together. Stir in raisins, walnuts, zucchini, pineapple and flour. Mix well. Spray 2 loaf bread pans with non stick spray. Bake 1 hour at 350 degrees. For variety you can add diced dates, prunes, grated chocolate or apricots.
To make muffins use less sugar and bake at higher temperature. 375-400 for 15 minutes.

Easy Chocolate Zucchini Cake


If you love chocolate cake, you must try this recipe. If you don't love chocolate cake, this recipe may just have you changing your mind. No lie. I tried this recipe a few years ago and bring it out ever summer when my garden starts to produce an abundance of zucchini. It is so moist and delicious.


1/2 cup butter, softened

4 eggs

1 tsp vanilla

1/4 tsp almond extract

1 cup sour cream

1 chocolate fudge cake mix with pudding in the box, approx 18.25oz.

1/2 tsp ground cinnamon

1 medium zucchini, about 1.5 cups shredded

1 cup semi-sweet chocolate chips

1 cup chopped pecans or walnuts


Grease and flour a 12 cup Bundt cake pan. Heat oven to 325 degrees.


With an electric mixer, beat the butter until light; beat in eggs and flavorings. Beat in the sour cream and cinnamon; then slowly beat in the cake mix. Stir in the zucchini, chocolate chips, and pecans.


Spoon the batter into the prepared pan and bake 40-50 minutes, or until a toothpick inserted in the center of the cake comes out clean. Cool on a rack for 15 minutes. Invert the cake onto a serving plate to cool completely. Frost the cake or dust with powered sugar.


I add a whole bag of chocolate chips and omit the nuts when I bake this cake. I drizzle a few ounces of melted chocolate over the cake after it has cooled. Mmmm, good.


Bake on!

M

In Honor of Dave Ramsey

I created these cupcakes using the same technique I used on Katie's bridal shower cupcakes, to celebrate the final class of Financial Peace University. My husband and I attended this 13 week course this summer which emphasizes saving your money! If you haven't heard of Dave Ramsey or FPU...check it out!!!


Thursday, August 18, 2011

Kathryn E.'s Bridal Shower


Here is an array of cupcakes that I made for my best friend's wedding. My instructions were to include red velvet and a variety of colors. I end up with red velvet, lemon and chocolate cupcakes with a variety of colored frostings. I created the decorative words by piping dark chocolate candy melt. I piped a heart, "love", "I do" and "A" as a monogram.


Bake on!

M


Tuesday, August 9, 2011

Miami Heat Cake

This cake was made for my nephew's 13th birthday party. He requested a Lebron James jersey from the Miami Heat. I created the cake using a cookie sheet as my baking pan. I made 2 cakes using the cookie sheet and filled the chocolate cakes with an oreo filling. I cut out the neckline of the cake and then covered it in white frondant. I have to give my husband credit for creating a template of the letters and number for me which I then cut out of red fondant. I traced the edges of the letters using a black edible marker. My husband also created the NBA logo found in the upper left hand corner of the jersey. He took a white piece of fondant and drew it freehand using the edible markers. I think the birthday boy was quite pleased.
Bake on!
Michele

Aargh, Matey!

This pirate cake was created for my nephew's 5th birthday party. I used 2 eight inch cakes layered with filling to create the pirate's face. I covered the whole thing in a flesh tone fondant and then added the accessory pieces. What a success!


Bake on!

Michele

Bridal Shower Tea Party Hat Cake


This hat cake was made for a bridal shower tea party. All attendees of the bridal shower wore a tea party hat. We constructed this cake using 1-10 inch cake as the base or brim and 2 layered 8-inch cakes. We fondanted the cakes separately using the brown ribbon to hide the seam. We achieved the brim my extending the fondant beyond the 10 inch cake instead of trimming it at the edge of the cake. We added the daisy, feathers, and pearls for accessories. Though they aren't edible, they did add a nice finishing touch.

Wednesday, July 6, 2011

Flag Cake

Made this patriotic cake for my super-duper cute goddaughter's baptism. I know, not the usual cake for a baptism, but it seemed kind of fitting being it was the day before the fourth of July. I had intentions of decorating the outside cuter but was frightened with the thought of it getting ruined in the heat and drive to the cabin. Caught everyone by surprise though when the first piece was cut!

And I was dying to try this design after I saw it pinterest (my new obsession!) And being the impatient person that I am, I just couldn't keep this one on the back burner until next year!


And here is the trick to all of the madness. Make a double batch of your favorite white cake recipe. Color the first batch red and divide it into two cake pans. With the second batch and divide it in half. Leave one half white and color the second half blue. When completed you will have two red cakes, one white, and one blue.

After they have cooled. Using a serrated knife or cake leveler, cut the two red cakes and one white horizontally in half. On your cake plate, start by place one of the red halves. Spread the top with a little bit of white filling. Then place one of the white layers on top and spread the top with white filling. And finally, put the red layer on top and spread with filling.

Now for the fun and clever part! Take the blue layer and cut a circle in the middle. I used a ten inch cake pan and cut a six inch circle in the middle. Works well to use a bowl or cake pan as a template. You can now indulge and eat the blue six inch circle if you wish!! Then take the remaining white layer and one of the red layers and stack them together. Using the same bowl or cake pan template, cut circles in the red and white layers. And again you can indulge in the outside rings of red and white cake!

And for the final assembly steps! Place the blue outside ring on top. Put the white circle in the middle first. Top with filling and then place the red circle on top! I highly suggest doing a crumb coat! And then frost and decorate as desired!!

Monday, June 27, 2011

Strawberry Rhubarb Pie

I'm baaaaccckk! Can't believe it has been a month and a half since the last post!

Thought I would come back with a bang though! This pie is A-M-A-Z-I-N-G! Love the strawberry and rhubarb combo. The tartness of the rhubarb and sweetness of the strawberries balance very nicely! And best of all, the strawberries and rhubarb are both fresh from the garden! Picked the strawberries today at a local farm and the rhubarb is from my grandma's garden!


And to top it off, the pie is covered with a buttery streusel topping! Definitely my favorite part! I will always pick a streusel topped pie over a double-crusted pie! Don't even have to think about it!


Strawberry Rhubarb Pie

for the filling:
2 3/4 cups sliced rhubarb
2 cups sliced strawberries
2/3 cup sugar
3 tablespoons cornstarch

for the topping:
1 cup flour
1/2 cup brown sugar
1/2 cup butter, cold and cut into small pieces
1 unbaked single pie crust

In a medium sized bowl, combine the rhubarb, strawberries, sugar, and cornstarch. Mix well. The mixture should be thick and syrupy after mixing. Pour the mixture into the pie crust and spread evenly.

In a second bowl, combine the flour and sugar. Using a pastry cutter, cut the butter into the flour/sugar mixture until it resembles coarse crumbs. Spoon streusel mixture evenly over the top of the pie.

Place the pie on a rimmed baking sheet and bake at 400 degrees for 50-55 minutes. You may need to cover the pie crust edges with foil halfway through to prevent burning.

Let the pie cool completely before cutting. Serve with a dallop of whipped cream or scoop of ice cream!

Monday, May 9, 2011

Knock You Naked Brownies

Oh my gawd! Delicious brownies with a generous layer ooey gooey caramel in the middle!

That ooey caramel was dripping on the counter the second after I snapped the photo! And the best part is that it was still soft and gooey after being refrigerated for an hour. Nothing worse than hard caramel that sticks to your teeth! But no worries about that with these scrumptious little babies!

The brownie base is actually made from a cake mix, but I promise you that no one will even be able to tell! Definitely doesn't have a "box cake" taste. Because of the cake mix these brownies are super easy and fast to whip up! The hardest part about making these is waiting for them to cool before being able to eat them.

These bad boys are delicious with a glass of milk, but are taken up a notch when served with a scoop or two of ice cream. Especially when they are still a little warm and they make the ice cream soft and soupy!

Knock You Naked Brownies

1 box german chocolate cake mix
1 cup chopped pecans
1/3 cup evaporated milk
1/2 cup butter, melted
60 Kraft caramels, unwrapped
1/2 cup evaporated milk
1/3 cup chocolate chips

Preheat oven to 350 degrees. In a large bowl, mix cake mix, chopped pecans, 1/3 evaporated milk, and melted butter. Stir together until well combined. Mixture will be very thick.

Press half of the mixture into a well-greased 8x8 inch pan. Bake for 8 minutes. Remove from oven and set aside.

In a double boiler, melt caramels and 1/2 cup evaporated milk. When completely melted, pour over brownie base. Sprinkle chocolate chips over caramel layer.

Turn out remaining brownie mixture onto work surface. Use your hands to press it into a square that is slightly smaller than the pan. Use a spatula to lift it off the counter and place on top of the caramel and chocolate chip layer.

Return pan to the oven and bake for 20 to 25 minutes. Remove from oven and allow pan to cool to room temperature. Then cover and refrigerate for several hours.

Source: Pioneer Woman
Linked to: Tidy Mom's I'm Lovin' It Friday

Friday, May 6, 2011

First Communion Cupcakes

I've looked at the candy molds many many times at Micheal's and JoAnn's, but have always passed them up. For some unknown reason I figured they just wouldn't worked. I envisioned the candy getting stuck in the molds and ruining them while trying to get 'em out. Well yesterday I decided to spend the whopping two dollars and give them a shot. And boy am I glad I did! Kind of want to go to Micheal's now and grab one of every design! They are so incredibly easy. And not one of them got stuck in the mold! They pretty much just fall right out!

And best of all, making these cute little candies is so much easier, faster, and less stressful than working with fondant! So glad we are finding some fun alternatives to fondant!

Monday, May 2, 2011

Lemon Tart

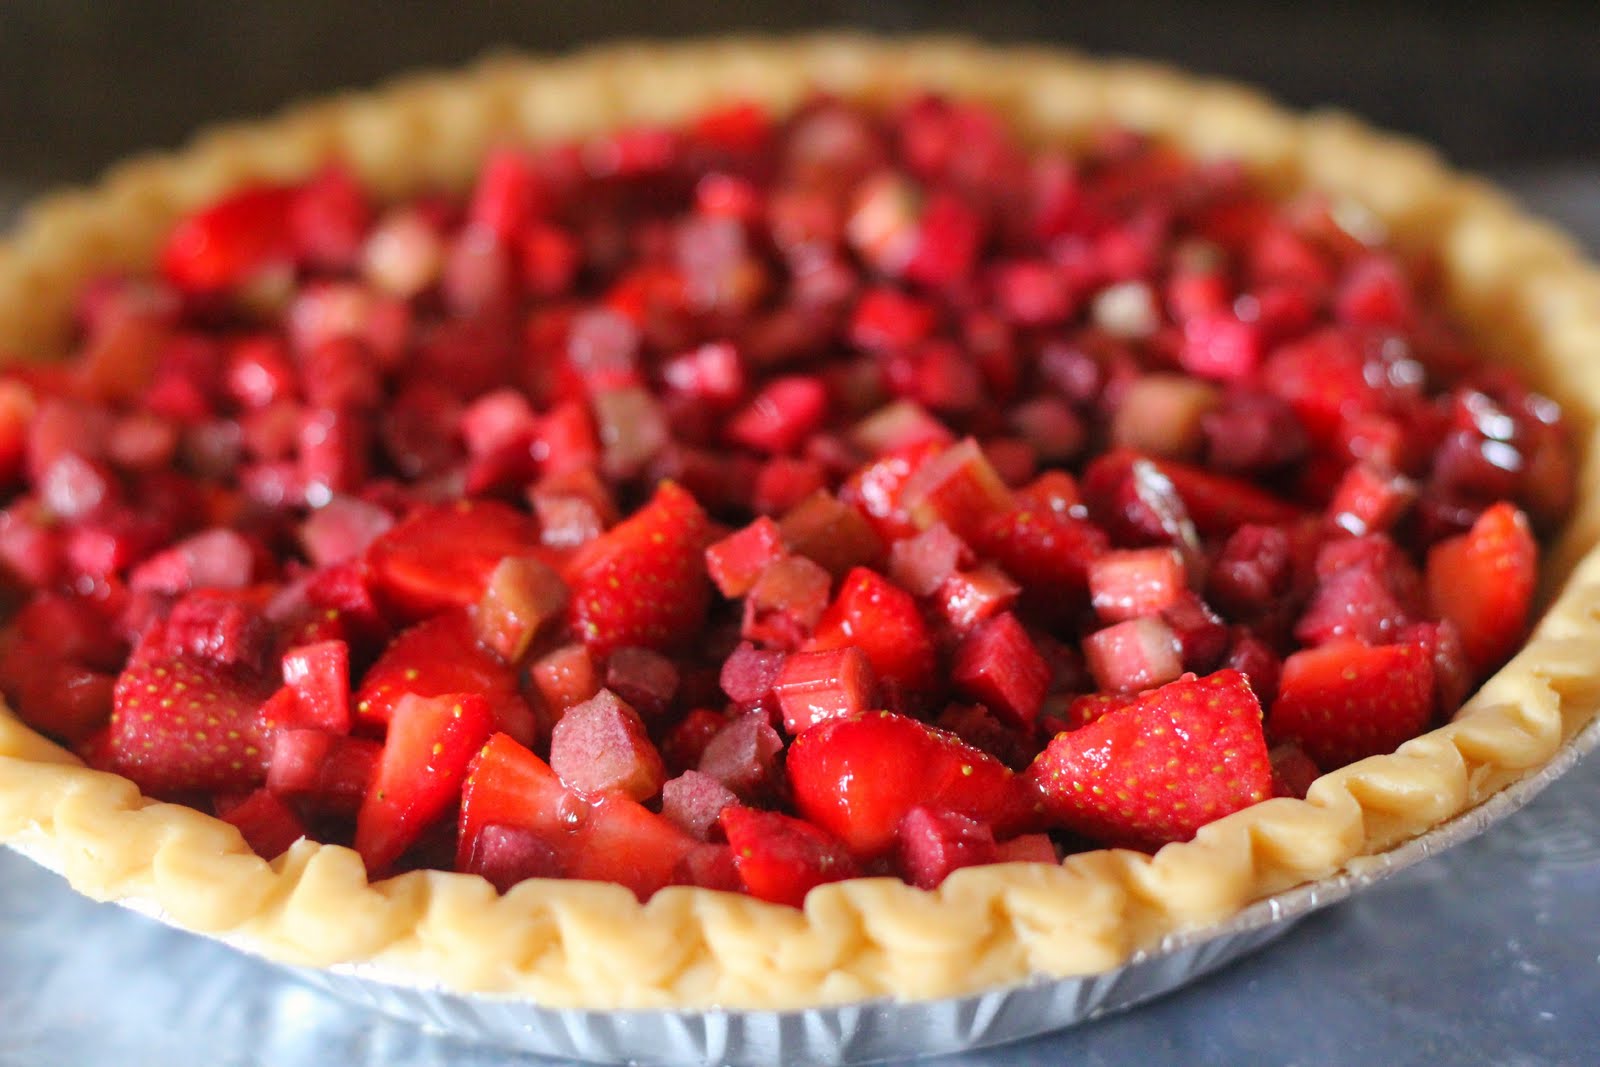
First and foremost, I must apologize for my poor picture. The family had dug into it before I could snap a decent photo... and my tin foil stuck to the whip cream. Do not let looks deceive you. This tart is absolutely amazing. Remember when Jess was blogging about a baking bucket list...well making a tart/torte has been on my list for quite some time. When I spotted this recipe I knew that it would be a nice compliment to my family's Easter dinner. This is a perfect light lemony spring dessert. I honestly can't wait to make it again and taste spring at its best. I'm proud to say that not only was it a tasty success on my first attempt at a tart but I also get to cross it off my baking bucket list.

So what stood out for me when I came across this recipe? Well, I do love lemon. It ranks right up there with pumpkin. So my eye always gravitates towards lemon recipes. This recipe has a shortbread crust. I love the light buttery taste of shortbread. Paired with lemon, cream cheese, and homemade whip cream, I knew that this would be a hit.

Crust:
1 cup flour
1/3 cup powdered sugar
1/8 tsp salt
1/2 cup cold, unsalted butter

Lemon filling:
5 oz cream cheese, room temperature
1/2 cup sugar
1/2 cup lemon juice
2 eggs
1 Tbsp lemon zest

Topping:
1/2 cup heavy whipping cream
1 Tbsp powdered sugar


Preheat oven to 425 degrees. Grease a 8-9 inch tart pan with a removable bottom. In a food processor place the flour, sugar, and salt. Process to combine. Add the butter and pulse until the pastry starts to come together and form clumps. Place the pastry in the prepared tart pan and, using your fingertips, evenly press the pastry onto the bottom and up the sides of the pan. Pierce the bottom of the crust with the tines of a fork. Cover and place the pastry shell in the freezer for 15 minutes to chill.

When the pastry is completely chilled, place the tart pan on a large baking pan and bake until the crust is golden brown, about 13-15 minutes. Remove from oven and place on a wire rack to cool while you make the filling.

Reduce the oven to 350 degrees.

In a food processor or electric mixer, place the cream cheese and process until smooth. Add sugar and process until incorporated. Add eggs, one at a time, and process until thoroughly combined. Add remaining ingredients and process until well blended and smooth. Pour filling into pre-baked tart shell and bake for approximately 25-30 minutes or until filling is set. Transfer tart to a wire rack to cool, then cover and refrigerate until well chilled, at least an hour.

Beat the whipping cream and powdered sugar until stiff peaks form. Cover the lemon layer with the whipped topping. Refrigerate until ready to serve.

Source: Joy of Baking
This recipe has also been linked to Cupcake Apothecary A Theme Bakers Sunday #2. Theme: Lemon

Bake on!
Michele

S'More Cookie Bars

Holy Cow!! It has been far too long since I have blogged. I have some catching up to do! I thought I would start out with a hit. These ooey gooey s'more bars are just as good as the sticky treats I grew up loving as a child. These treats are perfect for any season. While our s'more making season is quite limited in Minnesota, these are a perfect alternative and sooooooo much tastier than a "microwave s'more". The recipe is simple and the results are irresistible.

1/2 cup butter or margarine, softened
3/4 cup sugar
1 egg
1 tsp vanilla extract
1 1/3 cups flour
3/4 cup graham cracker crumbs
1 tsp baking powder
1 tsp salt
4 (1.55 oz. each) HERSHEY's Milk Chocolate bars
1 cup marshmallow creme

Heat oven to 350 degrees. Grease 8-inch square pan.

Beat butter and sugar in large bowl until light and fluffy. Add egg and vanilla; beat well. Stir together flour, graham cracker crumbs, baking powder and salt; add to butter mixture, beating until blended. Press half of dough into prepared pan.

Arrange chocolate bars over dough, breaking as needed to fit. Spread with marshmallow creme. Scatter bits of remaining dough over marshmallow; carefully press to form a layer.

Bake 30-35 minutes or until lightly browned. Cool completely in pan on wire rack. Cut into bars. Makes approximately 16 bars.

WARNING: wet nap not included!!
Bake on!
Michele

Linked to: Tidy Mom's I'm Lovin' It

Sunday, May 1, 2011

Salted Peanut Bars

Tonight I am having a total writer's block. Descriptive words just aren't flowing. So I asked Zach what I should write about these and his response was, "YUM! That's all that needs to be said!" Guess we will leave it at that!!


Salted Peanut Chews

base:
1 yellow cake mix
1 egg
1/3 cup margarine or butter
3 cups miniature marshmallows

topping:
2/3 cup corn syrup
1/4 cup margarine
2 teaspoon vanilla
1 package peanut butter chips
2 cups rice krispies
2 cups salted peanuts

Heat oven to 350 degrees. Combine cake mix, butter, and egg. Beat at low speed until crumbly. Press into 9x13 inch pan. Bake for 12-15 minutes or until light golden brown. Remove from oven and immediately sprinkle with marshmallows. Return to the oven for an additional one to two minutes or until the marshmallows begin to puff. Cool while preparing the topping.

In a saucepan, combine corn syrup, margarine, vanilla, and peanut butter chips. Heat until chips are melted and mixture is smooth. Remove from the heat and stir in cereal and peanuts. Immediately spoon over marshmallows and spread to cover. Refrigerate for one hour.

Linked to: Tidy Mom's I'm Lovin' It

Thursday, April 28, 2011

Neiman Marcus Chocolate Chip Cookies

These cookies rank right up there with my all time favorite white chocolate chip cookies. The secret to those cookies is the instant vanilla pudding, while the secret to these ones is the ground up oatmeal. Guess its not really a secret anymore since I just told all of you! I love that when you bite into these cookies there is a slightly crunchy outer layer followed by a super soft inner layer! And the softness remains hours after being baked. Wanted to make sure to test that for guys :)


Neiman Marcus Chocolate Chip Cookies

1 cup butter
1 cup granulated sugar
1 cup brown sugar
2 eggs
2 1/2 cups finely ground oatmeal
2 cups flour
1 teaspoon baking powder
1 teaspoon baking soda
12 ounces chocolate chips (I used half chocolate and half white chocolate chips)
4 ounce chocolate bar, chopped
1 1/2 cups chopped nuts (I left these out)

Preheat oven to 350 degrees. Cream butter and sugars. Add the eggs. Stir in the ground oatmeal. Sift together the flour, baking soda, and baking powder. Gradually add to mixture. Stir in chocolate and nuts. Form dough into tablespoon size balls. Bake for 10-11 minutes.

Linked to: Tidy Mom's I'm Lovin' It

Sunday, April 24, 2011

S'mores Cheesecake Bars

Guess we will have to experience spring and summer through our food this year since mother nature isn't willing to cooperate with us. Campfires and s'mores pretty much spell summer! I could sit around a campfire for hours just staring at the flames, but it isn't a true campfire until the marshmallows are roasted!

Love cheesecake. Love bars. Love cheesecake bars.

I tried the tiniest sliver of these bars since I was absolutely stuffed from Easter dinner, but that tiny little bite sent me straight to heaven. Took my love for s'mores to a whole new level!


S'mores Cheesecake Bars

Crust:
1 cup graham cracker crumbs
1 tablespoon sugar
4 tablespoons unsalted butter, melted

Cheesecake Filling:
4 ounces semi-sweet chocolate, coarsely chopped
8 ounces cream cheese, softened
1/4 cup sour cream
1/2 cup marshmallow cream
2 teaspoon cocoa
3/4 teaspoon vanilla
2 eggs

Topping:
1 1/2 cups miniature marshmallows
melted chocolate chips (optional)

Preheat oven to 350 degrees. Line an 8x8 inch baking dish with aluminum foil and spray lightly with cooking spray. Combine graham cracker crumbs, sugar and melted butter in a small bowl. Mix with a fork until well combined. Press the mixture into an even layer in the prepared pan. Bake for 10 minutes. Remove from an oven and allow to cool while preparing the filling. Lower oven temperature to 325 degrees.

Melt the coarsely chopped chocolate in a microwave safe bowl. Microwave in 30 second intervals, stirring in between intervals, until completely melted and smooth. Set aside and let cool. In the bowl of a stand mixer, combine cream cheese, sour cream, and marshmallow cream. Beat on medium high speed for 1-2 minutes until mixture is smooth. Add cocoa, vanilla, and eggs and mix until well incorporated. Stir in melted chocolate. Pour the filling over graham cracker crust and smooth the top with a spatula. Bake for 30 minutes or until the center does not jiggle when gently shaken. Remove for the oven and evenly top with mini marshmallows. Return to the oven for 2-3 minutes. Transfer to a wire cooling rack. When cooled to room temperature, drizzle with melted chocolate if desired. Refrigerate for 2-3 hours before cutting and serving.


Source: Annie's Eats
Linked to: Tidy Mom's I'm Lovin' It

Friday, April 22, 2011

Birds Nests


I have found so so many cute little Easter and spring time desserts while browsing the internet the past few weeks. And I had full intentions of making a few of them, but as usual, time just didn't allow it. Unfortunately baking got pushed to the end of to-do list. What a shame, huh!

But last night around midnight I decided I just had to make something. Anything. The only criteria were: 1. had to be quick and 2. wasn't going to the grocery store for ingredients. These cute birds nests matched both of the criteria! They took less than twenty minutes to make and only five ingredients! It was my lucky day (or should I say night!)


Birds Nests

3 cups miniature marshmallows
3 tablespoons unsalted butter
1/2 teaspoon vanilla
4 cups chow mein noodles
jellybeans

1. In a microwave safe bowl, melt the marshmallows and butter in 30 second intervals until smooth.
2. Stir in the vanilla.
3. Add chow mein noodles and stir until well coated.
4. Using your largest ice cream scooper, drop spoonfuls of the mixture on a parchment paper lined baking sheet.
5. Coat your fingers in shortening and form the spoonfuls into little nests by making a hole in the middle.
6. Fill nests with two to three jellybeans

Source: Bake at 350
Linked to: Tidy Mom's I'm Lovin It

Tuesday, April 19, 2011

Lemon Poppy Seed Bread

Not really sure if I should call this bread or cake. Made from a cake mix, but baked in a bread pan and doesn't have frosting. Call it what you want, but I'm gonna go with bread. Makes me feel a heck of a lot better about eating it.

This bread is so so delicious. A co-worker of mine brought a loaf of this bread to work one night and it took every fiber in my body to not eat the whole loaf. All I could think about that night was going into the break room and having another piece. And as always, the first words out of my mouth after taking a bite were, "I need this recipe!"

There is a chance, a very big chance, that this first loaf is already almost gone (I buttered the piece above just so I have an excuse to eat another slice.)But I do have plans of making another loaf this week and bringing it to our family brunch for Easter!


Lemon Poppy Seed Bread

1 yellow cake mix
1 box lemon instant pudding
4 eggs
1/4-1/2 cup vegetable oil
1/4 cup poppy seeds

Preheat oven to 325 degrees. Combine all of the ingredients together. Pour into a greased loaf pan. Bake until a toothpick inserted into the center comes out clean. I would tell you an exact amount of time to bake it, but unfortunately mine sunk in the middle because I didn't bake it quit long enough. I had mine in the oven for 35-40 minutes so you can start there and then do the toothpick test.

Sunday, April 10, 2011

Underwater Cupcakes

Made these for a cute little boy's first birthday party!!

Sorry for the crappy picture. Almost forgot to take one altogether. Snapped it last second as I was running out the door to deliver them. But they are little crabs, turtles, fish, starfish, and shark fins. The crabs were definitely my favorite. If only you could see the little pinchers in the picture. Overall though, I thought they turned out pretty cute!!

Lovebirds Cake

This is the cake that I made for my cousin's bridal shower this past weekend! I stumbled upon this cake about a week ago and knew I had to make it for her. Super cute and very fitting! But as you can I see I went with a simpler version and left out the grass and flowers. Sometimes less is more!

I was amazed at how easy this cake actually was to make! Not a single glitch or rough spot in the process. I think that fondant and I have finally worked out our differences and have becomes friends after all! Only took nine months!

And here is the beautiful bride-to-be with her cake!

Thursday, April 7, 2011

Cake Mix Truffles

These little truffles taste just like funfetti cake dipped in white chocolate! Could it get any better than that! As soon as I saw this recipe on The Girl Who Ate Everything, I knew I had to make them immediately. No time for messing around. Reminded me of the sugar cookie truffles I made a few months ago. The people who come up with these concoctions are geniuses! Maybe some day (far in the future) I will be able to dream up a fun and creative recipe rather than follow a recipe word for word like I do now.

They even have the signature sprinkles like funfetti!

1/2 cup softened butter
1/2 cup granulated sugar
1 cup yellow cake mix
1 1/2 cups all-purpose flour
1 teaspoon vanilla
3-4 tablespoons milk
3 tablespoons sprinkles

truffle coating:
16 ounces almond bark
1 tablespoon shortening
4 tablespoons yellow cake mix
sprinkles, for decorating

Using an electric mixer, beat butter and sugar until combined. Add cake mix, flour, and vanilla until mixed thoroughly. Stir in 3 tablespoons of milk, or more if needed, to make a dough consistency. Mix in sprinkles. Shape dough into one inch balls and place on wax paper lined cookie sheet. Chill the balls in the refrigerator for about 15 minutes.

While the dough balls are chilling, melt the almond bark and shortening in a microwave safe bowl at 30 second intervals until completely melted. Immediate mix in cake mix and stir until smooth. Using a fork, dip the dough balls in the almond bark. Shake off the excess almond bark by tapping the bottom of the fork on the side of the bowl. Place the truffles back on the wax paper lined cookie sheet and top with sprinkles. Dip remaining dough balls. Allow to sit at room temperature for about an hour until almond bark has hardened. Store in the refrigerator until ready to serve.

Saturday, April 2, 2011

Hunting Themed Groom's Dinner Cake

Before I get on with the actual cake, I would like to gloat for a second about the huge challenge Michele and I have finally mastered! We have always had difficulties fondanting a round cake. No matter how hard we tried we always ended up with a skirting effect around the bottom of the cake! We cringed at the thought of fondanting this cake and thought we were setting ourselves up for a disaster, but low and behold, something clicked for us this time around! We placed the fondant over the cake and set out to work on our opposite sides. Within a minute we looked at each other and we both said "my side is totally smooth!!" We did it! Finally conquered the fondant!! Prior to this cake we had said we were never going to fondant a round cake again, but now that we have finally gotten the hang of it, we already have plans for two upcoming cakes!

And now for the actual cake!! The bride surprised the groom with this cake for the groom's dinner! He has a love for hunting and wanted us to do something along those lines. This is what we came up with...

Now imagine a very large fondant "J" in front of the pheasant feathers. I didn't get a picture with that on because I didn't want to put it on before transportation.

These deer antlers caused us some issues, but added so much to the finished product! Definitely my favorite part of the whole cake!

Also wish I could have gotten a picture of the inside of this cake. Better yet, wish I could have actually eaten a piece of it! We did a vanilla buttermilk cake with a berry white chocolate mousse filling and covered with white chocolate buttercream frosting! All of the individual components of the cake were delicious, so I can only imagine how amazing they tasted together!

Sure hope the groom loved his special cake!!

Friday, April 1, 2011

Banana Oatmeal Gems

The other day I was looking for a new recipe to use up some of my old brown bananas. I was trying to stay clear of my usual, banana bread and banana crumb muffins. Here's a recipe for cookies that use ripened banana. While it only called for one banana, it was a welcomed change from my usual recipes.

1 cup butter or margarine
1 1/4 cup brown sugar
1 egg 1 banana, mashed
1 tsp vanilla
1 1/2 tsp cinnamon
1/4 tsp nutmeg
1/2 tsp salt
1 tsp baking soda
3/4 cup all purpose flour
3/4 cup whole wheat flour
2/3 cups dates, chopped
3 cups quick oats

Preheat oven to 375 degrees. Beat together butter and sugar until light and airy. Beat in egg, banana and vanilla. Combine spices, salt, baking soda and flours. Add to butter mixture. Mix well and stir in dates and oats. Dropped by rounded teaspoons onto greased cookies sheets. Bake 9-10 minutes for a chewier cookie or 11-12 minutes for a crisper cookie. Cool on a wire rack. Store in a covered container.

Here are a few changes that I made to the recipe: I used about 1-1.5 cups of raisins instead of dates. I also added a package of instant banana pudding to the recipe. Jess and I have learned from experience that adding a pudding mix to cookies makes them super soft and chewy...just what a cookie should be. Well, this was just another perfect example of that. They had that slightly crispy outer layer and were chewy and soft on the inside. Perfection. I didn't have enough quick oats for the recipe and so I ended up using a combination of quick cooking and old fashioned oats which worked out just fine. I found no need to grease my cookie sheet. I had no problems with the dough sticking to the pan.

When my husband tried them he said: bananas+oatmeal+raisins=a winning combination. I just loved that you could almost pass this off as a breakfast food. Bananas and oatmeal. Come on. Perfect breakfast on the go. :)

Source: Banana Oatmeal Gems

Bake on!
Michele

Tuesday, March 29, 2011

Heart Cookies

I'm guessing that some of you were wondering why Jess didn't include the recipe for these cookies in her post First Attempt at Royal Icing. Well, it's because I have the recipe. So, if you were looking for the recipe for the cut-outs with royal icing that we used as cupcake toppers, here you go...


Honey Christmas Cookies

1 cup sugar
1 cup strained honey
1 cup shortening
2 tsp hot water
1/4 cup chopped almonds (we didn't include almonds)
1 tsp cinnamon
1/2 tsp vanilla
1 tsp baking soda
pinch of salt
~3 1/2 cups flour +additional for rolling out dough

Cream sugar and shortening together. Mix baking soda, cinnamon, and vanilla together. Add honey and hot water to sugar and shortening mix. Mix both mixtures together, adding in enough flour to make a very stiff dough, about 3 1/2 cups. Cool mixture (I let the dough chill in the fridge for about an hour) and roll very thin, cut with cookie cutters. Bake at 350 degrees for 8-10 minutes.

Don't let the name deceive you. This cookie isn't limited to the Christmas season. It is perfect anytime. In my experience cut-out cookies are dull, boring, and have an undesirable texture. I will admit that in the past I only made them so that I could decorate them with lively colors and sprinkles to jive up my cookie trays. Well, these cookies look good and taste better. Enjoy!


Bake on!

Michele

Monday, March 28, 2011

Clone of a Cinnabon

I love recipe searching on allrecipes.com due to the tons of user comments and reviews and their many "top 20" lists. Out of their thousands and thousands of recipes, the recipe for these cinnamon rolls fell in the number six slot of their overall top 20 list. And still had five stars after over 4,000 user reviews! I was nearly heartbroken when I discovered that the dough had to be made in a breadmaker (which I do not own, yet.) So instead I sat and drooled over the recipe for weeks until I finally got my hands on my mom's breadmaker! Little does she know that she probably will never have this back in her kitchen! It has become mine now!

Of course I had to work night shift this weekend and was super bummed that I wouldn't have time to make these for Zach and I's Sunday morning breakfast tradition. Luckily he caught on to my hint and earned himself husband of the year award by already having the dough in the breadmaker when I woke up Sunday afternoon. Made my day, week, and possibly even month!

These cinnamon rolls taste exactly like Cinnabon! They are spot on!

For some reason I always assumed the middle layer was white sugar and cinnamon. Boy was I fooled. Brown sugar and cinnamon is definitely where it is at! And of course it is necessary to have an extra, extra thick layer!

And then there is the cream cheese frosting! This recipe makes a fairly large amount and so the rolls were very, very well covered! Just the way I like it! No such think as too much frosting!

I wasn't kidding when I said they were covered in frosting!

Are you surprised? And yes I did scrape off and eat of all of that extra cinnamon-y goodness.

You can find this insanely delicious recipe at allrecipes.com. You need to make these now! I already can't wait to make 'em again!

Wednesday, March 23, 2011

Peanut Butter Cup Crunch Brownies


Some of you may remember a few months ago when I posted about the Marshmallow Crunch Brownies. Well these babies are a spin-off from that delicious treat with the ooey-gooey marshmallow layer being replaced by an almighty peanut butter layer. I loved the marshmallow version, but of course I am a little partial to the peanut butter ones! Anything with peanut butter will always win!

Be prepared. You will become addicted to these. Seriously. I've been overtaken. Lost all control. Can't say I didn't warn you. They are one of the few treats that I haven't kicked out of the house immediately after making and boy am I am paying the price.

I can't even decide which layer is my favorite. The brownie layer is uber duber soft, chewy, and fudgey. Which might possibly be the result of me accidentally, maybe on purpose, cooking them a few minutes short. And then there's the chopped peanut and reese's peanut butter cup layer. Pretty sure by now you all know my love for peanut butter and it isn't necessary to say anything more. And the top layer of melted chocolate, peanut butter, and rice krispies. Oh. My. Lord. Could eat this by the spoonful! And quite possible that I did just that!


Chewy Brownie Layer
1/3 cup cocoa
1/2 cup plus 2 tablespoons boiling water
2 ounces unsweetened chocolate, finely chopped
4 tablespoons unsalted butter, melted
1/2 cup plus 2 tablespoons vegetable oil
2 eggs
2 egg yolks
2 teaspoons vanilla
2 1/2 cups sugar
1 3/4 cup flour
6 ounces bittersweet chocolate, coarsely chopped

Peanut Butter Layer
1/2 cup chopped salted peanuts
8-10 Reese's Peanut Butter Cups, chopped

Rice Krispie Layer
1 1/2 cups milk chocolate chips
1 1/2 cups creamy peanut butter
2 cups Rice Krispies cereal

Preheat oven to 350 degrees. Spray 9x13 pan with nonstick cooking spray. In a large bowl whisk cocoa and boiling water until smooth. Add unsweetened chocolate and stir until melted. Whisk in melted butter and vegetable oil. Add eggs, yolks, and vanilla. Whisk in sugar until incorporated. Add flour and stir until well combined. Fold in chopped bittersweet chocolate. Pour into prepared pan and bake for 28 minutes.

Remove from the oven and top with chopped peanuts and peanut butter cups. Return to the oven and bake and additional 3-5 minutes.

While they finish baking, in a microwave safe bowl combine chocolate chips and peanut butter. Microwave in 30-45 second intervals until chocolate chips are melted and mixture is smooth. Add rice krispies and stir until evenly coated. Remove the brownies from the oven and evenly spread the rice krispie mixture over the top. Refrigerate for at least two hours before cutting and serving.

Source: Brown Eyed Baker

Sunday, March 20, 2011

First Attempt at Royal Icing

Michele and I have been saying for many, many months that we have wanted to try decorating cookies with royal icing. And after our recent struggles with fondant we decided it was time to take a little break from fondant and try something new. We had a cupcake order for a bridal shower this weekend and rather than making fondant decorations we decided to top the cupcakes with a simple heart cut-out cookie with royal icing.


First of all, the taste of these little cookies is out of this world. They remind me of the store bought animal crackers with pink icing. And best of all, they are soft and fluffy! Like little cookie pillows.

We were both absolutely amazed at how fast and easy the whole royal icing process was. And we actually had fun doing it! Not a single moment of frustration (which is not the case when we work with fondant!) Cookies with royal icing are our new craze! Bye bye fondant and hello royal icing!

Saturday, March 19, 2011

Lemon Curd

A couple of months ago I started a "cooking and baking bucket list." And the list just keeps growing and growing. So many things I want to try making. And at the very top of that list was to make homemade lemon curd. Feels so good to finally cross off my first item on the bucket list!

For some unknown reason I have always thought that making lemon curd was an extensive and grueling process. So not true. Especially when it can be made in the microwave. Couldn't get any easier.


The lemon curd took these already amazingly delicious lemon cupcakes to a whole new level! I'm now obsessed with putting fillings in cupcakes! Such a fun little surprise when one takes their first bite!

Microwave Lemon Curd

1 cup sugar
3 eggs
1 cup fresh squeezed lemon juice
zest of three lemons
1/2 cup unsalted butter, melted

In a large microwave-safe bowl, whisk together the sugar and eggs until thoroughly combined. Whisk in the lemon juice, zest, and butter.

Cook in the microwave on full power in one minute intervals. Stir after each minute. Cook for 3-5 minutes. The lemon curd is done when it coats the back of the spoon.

Refrigerate in airtight jar. Can be stored for up to two weeks.

Source: My Baking Addiction

Thursday, March 10, 2011

Baked Peanut Butter Oatmeal

I know this isn't like our typical posts of cakes, cupcakes, cookies, and bars, but it sure smelt and tasted like a peanut butter oatmeal cookie! And it was just too darn good to not share with all of you!

Casserole sized Peanut Butter Oatmeal Cookie!!

Sure seems like there is a lot of hype about baked oatmeal and steel cut oats lately. And I jumped right on that bandwagon. Seemed fitting being that I consider myself an oatmeal addict. Willing to bet that I eat oatmeal at least five, if not six, days a week. Not always for breakfast either. Numerous times when I have eaten it for lunch or supper. Making a packet of instant oatmeal is about as easy as it gets. But after having this baked oatmeal it is sure is going to be hard to go back to the instant oatmeal. Ya know the stuff that always smells better than it actually tastes.

And look how ooey gooey the middle was!

I highly recommend having a tall glass of milk handy when eat this! The website where I found the recipe even suggested pouring milk right over the top of it. Either way, you will need some milk!


Baked Peanut Butter Oatmeal

1 1/2 cups quick oats
1/4 cup brown sugar
1/4 cup white sugar
3/4 cup milk
1/4 cup melted butter
1 egg
1 teaspoon baking soda
1 teaspoon vanilla
1/2 cup creamy or chunky peanut butter

Preheat oven to 350 degrees. Grease either an 8x8 inch pan or 1 quart casserole. Mix all the ingredients together in a large mixing bowl. Spread into pan and bake for 20-25 minutes or until edges are golden brown. May top with sliced bananas, chocolate chips, yogurt, or maple syrup.

Source: Tidy Mom

Key Lime Bars

Lately every recipe that catches my eye is fallish- pumpkin, apple, carrot, and spice. It is taking all my strength to fight this urge. But I'm not about to go back in time. We are too close to spring now! Hence my decision to back these key lime bars!

Oh the taste of sunshine! Makes me want a margarita!

You can't see the flecks of lime zest in this picture, but trust me, it is there! With the lime zest and fresh squeezed lime juice, they have quit the limey flavor! But oh so creamy and delicious!


Key Lime Bars

for the crust:
1 1/4 cups animal cracker crumbs
3 tablespoons brown sugar
4 tablespoons unsalted butter, melted

for the filling:
2 ounces cream cheese, room temperature
1 tablespoon lime zest
14 ounce can sweetened condensed milk
1 egg yolk
1/2 cup fresh lime juice (about 13 key limes or 6 regular limes)

garnish:
3/4 cup sweetened shredded coconut, toasted until golden and crisp

Preheat oven to 325 degrees. Grease 8x8 inch pan with nonstick cooking spray.

Combine animal crumbs and brown sugar. Drizzle butter over crumbs and mix until evenly moistened with butter. Press crumbs evenly and firmly into bottom of prepared pan. Bake until deep golden brown, 18-20 minutes. Cool on wire rack while making filling. Do not turn off the oven.

While crust cools, in medium bowl, stir cream cheese and lime zest until softened creamy, and thoroughly combined. Add sweetened condensed milk and whisk vigorously until incorporated and no lumps of cream cheese remain. Whisk in the egg yolk. Add lime juice and whisk gently until incorporated.

Pour filling onto crust. Spread to corners and smooth surface with rubber spatula. Bake until set and edges begin to pull away slightly from sides, about 15-20 minutes. Cool on wire rack to room temperature, 1 to 1 1/2 hours. Cover with foil and refrigerate until chilled, at least two hours.

Sprinkle with toasted coconut, if using, and serve. You could also serve with a dallop of whipped cream.

Sunday, March 6, 2011

Buckeyes


Ever since I checked the book, Bake Explorations, out from the library, I have been dying to make this recipe. Chocolate+Peanut Butter+Cream Cheese+Graham Crackers=YUM! I knew with a list of ingredients like this it had to be a winning recipe. Apparently these treats are best known in Ohio where this candy resembles the horse chestnut from the Buckeye State. Living in Minnesota I have never heard of them, but sure do love em! They literally taste like you are eating peanut butter cookie dough wrapped in chocolate. The insides are light and soft just like cookie dough. One of my coworkers said it best when she said, "these are better than sex balls" as she kept popping them in her mouth. Too funny. I know there was more than one person who was having a hard time having just one. Warning: these may cause you to overindulge.

1/4 cup cream cheese, softened
1 1/2 cups peanut butter
1 cup graham cracker crumbs
3 cups confectioners' sugar
10 tbsp unsalted butter, melted and cooled
12 oz good-quality dark chocolate

In the bowl of a standing mixer fitted with a paddle attachment, beat the cream cheese and peanut butter until combined. Add the graham cracker crumbs and beat on medium speed for 10 seconds. Add the confectioners' sugar and butter. Beat at low speed for 20 seconds to prevent the sugar from spilling over; then gradually increase the speed until the mixture is completely combined. Scrape down the sides and bottom of the bowl and beat again. The mixture will feel slightly dry. Set the peanut butter filling aside while you melt the chocolate.

In the top of a double boiler set over hot water, melt the chocolate, stirring frequently until it is completely smooth. pour the chocolate into a small, deep bowl. Let it cool to tepid (about 100 degree) while you shape the peanut butter centers.

Line a sheet pan with parchment paper. Scoop out slightly more than 1 tablespoon's worth of filling and use your hands to form it into a ball. Place the ball on the prepared sheet pan and repeat the process until all the filling has been shaped. The balls can sit fairly close to each other on the sheet, just make sure they are not touching.

One by one, use a fork or large skewer, dip each ball into the chocolate. Roll the ball around from side to side to cover almost the entire peanut butter center, leaving a small part uncovered. Manipulate the buckeye so that the dripping chocolate covers the holes made by the fork. Let the excess chocolate drip back into the bowl and return each chocolate-covered buckeye to the pan. Refrigerate the entire sheet pan for about 30 minutes to set the chocolate before serving.
Bake on!
-Michele

Toffee Fingers

I love toffee and couldn't resist making this recipe. The light buttery crust pairs up perfectly with the toffee and chocolate. Yum. It's such an easy recipe to make with such satisfying results.

1 1/4 cups all -purpose flour
3/4 tsp baking powder
1/4 tsp salt
1/2 cup butter, softened
1/4 cup powdered sugar
2 tbsp packed brown sugar
1/2 cup toffee pieces
1/2 cup semisweet chocolate pieces
1 tsp shortening
1/4 cup toffee pieces

1. Preheat oven to 325 degrees. Line an 8x8 inch square baking pan with foil, leaving about 1 inch of foil extending over the ends of the pan; set aside.

2. In a small bowl stir together the flour, baking powder, and salt; set aside. In a large mixing bowl beat butter with an electric mixer on medium to high speed for 30 seconds. Add powdered sugar and brown sugar. Beat until combined, scraping sides of bowl occasionally. Beat in flour mixture. Stir in the 1/2 cup toffee pieces. Press mixture evenly into bottom of the prepared pan.

3. Bake in the preheated oven about 20 minutes or until light brown. Cool slightly in pan on a wire rack.

4. If using foil, remove warm bars from pan, using the overlapping foil to lift bars; place on cutting board. Cut into eight 1-inch strips. Cut each strip crosswise into three pieces, making 24 bars. Transfer bars to wire rack placed over waxed paper; cool completely.

5. In a small heavy saucepan heat and stir chocolate pieces and shortening over low heat until smooth. Cool slightly. Drizzle bars with melted chocolate. Immediately sprinkle bars with 1/4 cup toffee pieces. Let bars stand until chocolate is set.


Bake on!
-Michele

Friday, March 4, 2011

Caramel Filled Rice Krispie Bars

I nearly died the first time Zach's mom made these bars! I can't even find words to express my love for them!!


Kind of surprising, but this is actually my first time making these bars! Up to this point I haven't had to because Zach's mom always pulls through. And everything always tastes better when someone else makes it for you, right?

Usually I go for the bars on the inside of the pan. Ya know, the ones that are soft and gooey. Well with these, go for the ones around the outside edge. And this is why....


They are loaded with caramel!! Especially the ones in the four corners! As you push down the top layer of rice krispies, the caramel gets pushed to the outer edges and corners.

As you won't even believe how easy these are to make. Only five ingredients!


Caramel Filled Rice Krispie Bars

12 cups rice krispies
8 cups miniature marshmallows
6 tablespoons butter
1 bag of Kraft caramels
1 can sweetened condensed milk

Measure out rice krispies into a very, very large mixing bowl and set aside

Unwrap caramels and place in a medium microwave safe bowl. Pour in sweetened condensed milk. Start by microwaving for two minutes. Stir afterwards. Likely will have to return the mixture to the microwave, but this time only microwave at 30 second intervals until smooth. Stir between each interval.

In another microwave safe bowl, measure out the marshmallows and butter. Microwave at 30 second intervals until smooth. Pour mixture into the large mixing bowl with rice krispies. Mix until rice krispies are well coated. Pour half of the mixture into a well greased 9x13 pan and evenly press into pan using buttered fingers or wax paper.

Pour caramel mixture over the top of the rice krispies that have been pressed into the pan. Evenly spread over the top. Press remainder of rice krispies over the top of the caramel mixture. Let cool for a few hours before serving.